


7 Practical Heat Press Startup Tips: A 2025 Guide for Global Entrepreneurs
September 11, 2025
Abstract
Starting a heat press business in 2025 presents a significant opportunity for entrepreneurs in emerging global markets. This comprehensive guide examines the fundamental principles and practical steps for launching a successful venture centered around custom decoration. It provides an in-depth analysis of machine selection, differentiating between hobbyist and professional-grade equipment, including specialized units like mug and hat presses. The core operational variables of time, temperature, and pressure are explored through a scientific lens, explaining their critical interplay in achieving durable, high-quality transfers. The article further investigates the complex landscape of materials, from heat transfer vinyl and sublimation inks to the substrates themselves, emphasizing the necessity of empirical testing. It outlines best practices for workspace organization, business planning, and meticulous documentation. By deconstructing the process into manageable components, this text aims to equip aspiring business owners with the knowledge and heat press startup tips needed to navigate common challenges and build a profitable, sustainable enterprise from the ground up.
Key Takeaways
- Select a heat press that aligns with your business goals and production volume.
- Master the relationship between time, temperature, and pressure for perfect results.
- Always test new materials and substrates before starting a large production run.
- Develop a solid business plan that includes pricing, marketing, and a target niche.
- Document your settings for every successful job to ensure future consistency.
- Following these heat press startup tips can significantly reduce costly initial errors.
- Explore different transfer methods to diversify your product offerings.
Table of Contents
- Choosing Your First and Most Important Tool: The Heat Press
- The Three Pillars of Heat Pressing: Time, Temperature, and Pressure
- The World of Materials: Sourcing Quality Transfers and Substrates
- Creating Your Sanctuary: Workspace Design for Efficiency and Safety
- From Hobby to Enterprise: Building a Sound Business Foundation
- The Art of Repetition: Practice, Testing, and Meticulous Documentation
- Expanding Your Craft: A Deeper Look at Heat Transfer Technologies
- Frequently Asked Questions (FAQ)
- Conclusion
- References
Choosing Your First and Most Important Tool: The Heat Press
The journey into the world of custom apparel and merchandise begins with a single, pivotal choice: the heat press itself. This machine is not merely a piece of equipment; it is the heart of your production, the fulcrum upon which your creative and commercial ambitions will pivot. To approach this decision with the necessary gravity is to lay a strong foundation for your entire venture. It requires a thoughtful inquiry into your own intentions. Are you a hobbyist exploring a newfound passion, or are you an entrepreneur with a clear vision for a small business? The answer to this question will guide you through the diverse landscape of available machines.
Consider the distinction between a simple tool and a partner in your craft. A basic, entry-level machine might suffice for occasional personal projects, much like a simple hammer can drive a nail. A professional-grade machine, however, is more akin to a complete workshop, offering precision, reliability, and the versatility to grow with you. As we explore the options, think about where you see yourself in one year, or even five. The initial investment in a more capable machine can prevent the future cost and disruption of needing to upgrade just as your business begins to find its footing. The insights from resources like highlight the difference between home-use and small-business level presses, a distinction that is fundamental to this decision-making process.
Clamshell, Swing-Away, or Drawer? Understanding the Core Designs
The physical design of a heat press dictates its workflow, space requirements, and even the types of items you can press. The three primary configurations are the clamshell, the swing-away, and the drawer press. Each possesses a distinct character and set of capabilities.
The clamshell is often the first machine new entrepreneurs consider. Its design is simple and space-efficient. The top platen opens and closes in a hinge-like motion, much like a clamshell. Its main advantage is speed in a high-volume production environment where the user is pressing many identical, flat items like t-shirts. The motion is direct and requires minimal movement. However, a potential drawback is the limited access to the lower platen. The heating element is always looming directly above where you must place your garment and transfer, which can be uncomfortable and increases the risk of accidental burns. It also can struggle to provide perfectly even pressure on thicker items, as the pressure is often greater at the back (near the hinge) than at the front.
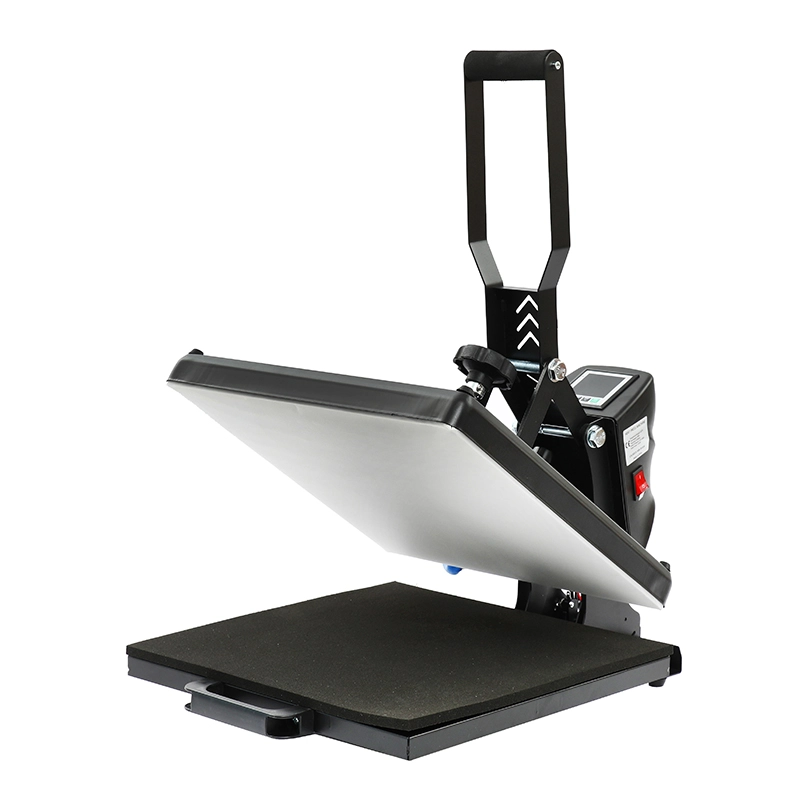
The swing-away design, in contrast, offers a different philosophy of operation. Here, the top heating platen swings completely away from the lower platen, providing unobstructed, safe access to your work area. This makes it far easier to arrange your garment, position your transfer with precision, and work with thicker items like hoodies or plaques. The pressure from a swing-away press is typically applied more evenly across the entire surface. The trade-off is that it requires a larger operational footprint. You need clear space for the top platen to swing out to the side. For those prioritizing safety and precision over raw speed, the swing-away is often the superior choice.
A third option, the drawer press, presents a hybrid solution. The top platen remains stationary while the lower platen slides out toward the operator like a drawer. This provides the easy access of a swing-away model but within a more contained footprint, as there is no side-to-side swinging motion. It is an excellent compromise for those with limited space who still desire a safer and more precise layout area than a clamshell offers.
| Feature | Clamshell Press | Swing-Away Press | Drawer Press |
|---|---|---|---|
| Footprint | Smallest, compact design | Largest, requires side clearance | Medium, requires front clearance |
| Workspace Access | Limited, heat platen is overhead | Excellent, full access to lower platen | Excellent, lower platen slides out |
| Pressure Application | Can be uneven on thick items | Very even, direct downward pressure | Very even, direct downward pressure |
| Best For | High-volume t-shirt production | Precision, safety, thick items | Space-conscious users needing precision |
| Ease of Use | Simple, fast for repetitive tasks | Slower cycle, but safer layout | Safe layout, efficient workflow |
The Significance of Platen Size and Interchangeability
The platen is the heat-applying surface of your machine. Its size is not a trivial detail; it defines the maximum dimensions of any design you can create in a single press. A standard starter size is often around 15×15 inches (38×38 cm), which is versatile enough for most adult t-shirts and other common items. However, if you envision creating oversized designs, decorating team jerseys with large back numbers, or working on all-over print concepts, a larger press, such as a 16×20 inch (40×50 cm) model, becomes a necessity.
Conversely, working with small or awkwardly shaped items can be challenging on a large, flat platen. Pressing a baby onesie, a sleeve, or a tote bag pocket on a large press can result in uneven pressure as the platen hits seams, collars, or zippers. This is where the concept of interchangeable platens becomes invaluable. Some higher-end machines allow you to swap out the standard lower platen for smaller ones of various sizes and shapes. Having a small 6×10 inch platen for youth shirts or a 4×4 inch platen for logos can dramatically improve your quality and efficiency. When evaluating a potential heat transfer machine, ask yourself not just what you want to make now, but what you might want to make in the future. The flexibility of interchangeable platens is a feature that grows with your business's creative ambitions.
The Power of Combination: Exploring the Combo Heat Press Machine
For the entrepreneur eager to diversify their product offerings from day one, the combo heat press machine presents a compelling proposition. These multifunction units are the Swiss Army knives of the heat press world. A typical combo press, discussed by providers like , combines a standard flat platen press with a set of attachments that allow you to decorate a wide array of items.
Imagine being able to offer your customers not just a custom t-shirt, but a matching cap and a personalized mug, all produced from a single machine. This is the power of a combo press. These kits typically include a mug attachment (often with various sizes for different styles of mugs), a plate attachment (usually in two sizes), and a cap attachment. The hat heat press machine attachment features a curved platen that matches the contour of a baseball cap, allowing for seamless application on a surface where a flat press would fail. Similarly, the mug press machine attachment wraps around a cylindrical mug, providing the consistent heat and pressure needed for sublimation.
The primary benefit is economic and spatial efficiency. You are purchasing several machines' worth of capability in one package. For a startup in a small apartment in Southeast Asia or a home office in South Africa, this consolidation is a significant advantage. However, one must consider the potential trade-offs. The process of switching between attachments takes time and effort, which can slow down production if you are frequently changing from shirts to mugs to hats. A dedicated, standalone mug press machine will always be faster for a large order of mugs than a combo unit. A combo press is ideal for the business focused on offering a wide variety of personalized, low-to-medium volume items rather than mass-producing a single product type. A great place to explore different heat press machine products can provide a clearer picture of the options available.
The Three Pillars of Heat Pressing: Time, Temperature, and Pressure
To master the heat press is to understand the intimate and delicate dance between three fundamental forces: time, temperature, and pressure. These are not just settings you dial into a machine; they are the active ingredients in a chemical and physical transformation. Getting them right is the difference between a vibrant, durable design that becomes one with the fabric, and a peeling, faded mistake that disappoints your customer. Achieving this balance is the core skill of every successful heat printer. It is a process that requires precision, patience, and a willingness to learn from your materials.
Think of it as a recipe. If you are baking a cake, you cannot arbitrarily change the oven temperature, baking time, or the amount of flour and expect a good result. The same principle applies here. Every combination of transfer material and substrate (the item you are pressing onto) has its own unique "recipe" for a perfect application. Your role as the artisan is to discover and perfect these recipes.
Temperature: The Catalyst for Adhesion
Temperature is the energy that awakens the adhesive on the back of your transfer material. As explained by industry experts like , heat-applied materials have a heat-sensitive adhesive that, when raised to a specific temperature, becomes molten and bonds with the fibers of the substrate (Stahls', 2025a).
Too little heat, and the adhesive will not activate properly. The transfer may look fine immediately after pressing, but it will likely peel or crack after the first wash. It has not achieved a true bond with the garment. Too much heat, on the other hand, can be just as destructive. Excessive temperature can burn the adhesive, rendering it ineffective. It can also scorch or discolor the garment itself, leaving a permanent yellowed outline of your heat platen. Certain fabrics, like heat-sensitive polyester or nylon, are particularly susceptible to damage from high temperatures.
Every material has an optimal temperature range. For example, standard heat transfer vinyl (HTV) for cotton shirts might require a temperature of 305-320°F (150-160°C). In contrast, sublimation, a process where ink turns into a gas and dyes polyester fibers, requires much higher temperatures, typically around 385-400°F (195-205°C). Your first duty is to consult the manufacturer's instructions for every type of transfer material you purchase. These instructions are your starting point, your baseline recipe.
Pressure: The Force of Integration
Pressure is the physical force that pushes the softened adhesive into the weave of the fabric, creating a permanent mechanical bond. It ensures that the design is not just sitting on top of the shirt but is truly integrated with it.
Incorrect pressure is a common source of failure for beginners. If the pressure is too light, the adhesive will not be pushed deeply enough into the fabric's fibers. This results in poor adhesion, leading to peeling, especially at the edges of the design. You might notice the texture of the fabric is not visible through the applied vinyl, a tell-tale sign of insufficient pressure.
Conversely, excessive pressure can also cause problems. It can squeeze the molten adhesive out from the edges of the design, creating a thin, unsightly outline. In the case of HTV, extreme pressure can push the material so deep into the fabric that it appears thin and the color loses its vibrancy. For certain specialty materials like puff vinyl (which expands to create a 3D effect), too much pressure will flatten the puff and ruin the effect.
How do you judge pressure? On many manual presses, it is a matter of feel. You will adjust a knob and then lock the handle down. "Medium pressure" is often described as requiring a firm, two-handed effort to close the press. "Light pressure" might be closable with one hand. It takes practice to develop a consistent feel. More advanced presses have digital pressure readouts, which remove the guesswork and allow for perfect, repeatable results. This is one of the key heat press startup tips: learn what correct pressure feels and looks like for your specific machine.
Time: The Duration of Transformation
Time is the element that controls the duration of the heat and pressure application. It is the window during which the chemical and physical bonding process occurs.
If the pressing time is too short, the adhesive may not have sufficient time to fully melt and penetrate the substrate, even if the temperature and pressure are correct. This is another cause of poor adhesion and failed wash tests.
If the pressing time is too long, you risk the same issues as having the temperature too high. You can burn the adhesive, damage the transfer material, and scorch the garment. For sublimation, excessive time can cause the image to look blurry or "ghosted" as the gaseous ink spreads too far beyond its intended borders.
Pressing times can vary dramatically, from as little as 5-10 seconds for some modern HTV materials to over 60 seconds for sublimation on ceramic mugs. As with temperature, you must always start with the manufacturer's recommended time for your specific transfer material. A digital timer is a non-negotiable feature on any serious heat press. It provides the precision needed to ensure every item you produce receives the exact same treatment.
| Material Type | Common Fabric | Temperature Range (°F/°C) | Time (Seconds) | Pressure |
|---|---|---|---|---|
| Standard HTV | Cotton, Polyester, Blends | 305-320°F / 150-160°C | 10-15 | Medium-Firm |
| Glitter HTV | Cotton, Polyester, Blends | 320-330°F / 160-165°C | 15-20 | Firm |
| Stretch HTV | Spandex, Lycra Blends | 300-320°F / 150-160°C | 12-15 | Medium |
| Sublimation (Fabric) | 100% White/Light Polyester | 385-400°F / 195-205°C | 45-60 | Light-Medium |
| Sublimation (Mugs) | Sublimation-Coated Ceramic | 385-400°F / 195-205°C | 60-180+ | Firm (in mug press) |
| Screen Printed Transfers | Cotton, Blends | 325-375°F / 163-190°C | 7-12 | Firm |
This table serves as a general guide. Always defer to the specific instructions provided by the manufacturer of your transfer material.
The World of Materials: Sourcing Quality Transfers and Substrates
A heat press is a powerful tool, but it is only one part of the creative equation. The materials you choose to press—the transfers—and the items you press onto—the substrates—are just as vital to the final quality of your product. Navigating the vast world of materials can feel overwhelming at first, but understanding the main categories and the importance of quality sourcing is a foundational skill. This is not a place to cut corners. Using cheap, unreliable materials will lead to failed products, unhappy customers, and a damaged reputation, regardless of how good your heat press is.
Think of your materials as the ingredients for a gourmet meal. A world-class chef cannot create a masterpiece with subpar produce. Similarly, you cannot create a premium custom product with flimsy t-shirts or transfer vinyl that peels after one wash. One of the most important heat press startup tips is to establish relationships with reputable suppliers and to understand the characteristics of the materials you work with.
Understanding Heat Transfer Vinyl (HTV)
Heat Transfer Vinyl, or HTV, is likely the first material you will work with. It is a polyurethane material that comes on a clear carrier sheet. You use a vinyl cutter to cut your design into the material (in reverse), "weed" away the excess vinyl, and then press the design onto your substrate.
HTV comes in a staggering variety of colors, finishes, and special effects. Standard HTV offers a smooth, matte, or glossy finish in hundreds of colors. Beyond that, you can find:
- Glitter HTV: Infused with glitter particles for a sparkling effect.
- Flock HTV: Has a soft, fuzzy, suede-like texture.
- Metallic/Foil HTV: Provides a shiny, reflective chrome or foil look.
- Stretch HTV: Offers extra flexibility for pressing onto performance wear and stretchy fabrics like spandex.
- Puff HTV: Expands during pressing to create a raised, 3D effect.
- Glow-in-the-Dark HTV: Charges with light and glows in the dark.
- Patterned HTV: Comes pre-printed with patterns like camouflage, plaid, or animal prints.
The quality of HTV varies significantly between brands. High-quality vinyl is typically thinner, easier to weed, and more durable in the wash. Cheaper vinyl can be thick, difficult to work with, and prone to cracking or peeling. It is always wise to order sample kits from different suppliers to find a brand that you like working with and that holds up to your quality standards.
The Magic of Sublimation
Sublimation is a different process entirely. It is not a layer of material sitting on top of the fabric; it is a dyeing process. It involves printing a design with special sublimation ink onto sublimation paper. When heated, the ink turns into a gas and permeates the fibers of the substrate, bonding with them permanently. The result is a design with zero feel or "hand," incredible vibrancy, and unmatched durability. The design will not crack, peel, or fade.
However, sublimation has two major limitations. First, it only works on polyester or materials with a special polymer coating. It does not work on 100% cotton because the gaseous ink needs the synthetic fibers to bond with. You can press on poly-cotton blends, but the vibrancy will be reduced, resulting in a "vintage" look, as the ink only dyes the polyester threads. Second, because it is a dyeing process, it only works on white or very light-colored substrates. You cannot sublimate a yellow design onto a black shirt, just as you cannot draw on black paper with a yellow marker and expect it to show up.
Sublimation is the go-to method for creating full-color photographic images on polyester apparel, as well as for decorating hard-surface items like ceramic mugs, phone cases, and metal signs, all of which must have a special sublimation-ready coating. A mug press machine is essential for anyone serious about producing high-quality custom mugs with this method.
Choosing Your Substrates: The Canvas for Your Art
The "substrate" is the blank item you are decorating. The quality of your substrate is paramount. A beautiful design will be wasted on a t-shirt that shrinks, loses its shape, or feels rough to the touch.
For t-shirts, the most common substrate, you will primarily encounter 100% cotton, 100% polyester, and poly-cotton blends (like 50/50 or 60/40).
- 100% Cotton: Soft, breathable, and a great surface for most types of HTV. Ringspun cotton is generally softer and more premium than standard carded open-end cotton.
- 100% Polyester: The required fabric for sublimation. It is also common for athletic and performance apparel due to its moisture-wicking properties. It requires lower temperatures and shorter press times for HTV to avoid scorching.
- Poly-Cotton Blends: Offer the best of both worlds—the softness of cotton and the durability and wrinkle-resistance of polyester. They are a versatile choice for many HTV applications.
Beyond t-shirts, the possibilities are vast. You can press on hoodies, tote bags, hats, koozies, mousepads, and more. As noted by , bags and team uniforms are also popular items (Stahls', 2025a). The key is to ensure the material is compatible with your transfer method and can withstand the heat of the press. Always check the material composition of your blanks. When in doubt, a crucial heat press startup tip is to test. Sacrifice one item to find the perfect settings before you risk an entire batch. As recommended in a material selection guide from Stahls', testing with samples is always the best practice due to the wide variety of textiles (Stahls', 2025b).
Creating Your Sanctuary: Workspace Design for Efficiency and Safety
Your workspace is more than just the place where you put your heat press. It is your command center, your production line, and your creative studio. Designing it with intention can have a profound impact on your productivity, the quality of your work, and your personal safety. A disorganized, cramped, or unsafe workspace leads to frustration, mistakes, and potential hazards. A well-planned space, on the other hand, fosters a smooth, efficient workflow and a more enjoyable creative process. This is true whether you have a dedicated commercial workshop or a small corner of a room in your home.
Let us think about the journey of a single t-shirt, from a blank canvas to a finished product. It starts with the design on a computer, moves to a cutter, then to a weeding station, then to the heat press, and finally to a cooling and folding area. A logical workspace layout should mirror this flow, minimizing unnecessary steps and creating an intuitive path for production.
Electrical and Safety Considerations
A heat press is a powerful appliance that draws a significant amount of electricity, primarily for its heating element. It is not like a lamp or a laptop charger. Plugging your heat press into a power strip already loaded with other devices or into an old circuit shared with major appliances is a recipe for tripped breakers or, in worse cases, an electrical fire.
Ideally, your heat press should be on a dedicated electrical circuit. This is a circuit that serves only that one outlet, ensuring the press has all the power it needs without competing with other appliances. If a dedicated circuit is not possible, at least ensure the circuit you use has a high enough amperage rating (check your home's breaker box) and that no other high-draw appliances (like a refrigerator, microwave, or air conditioner) are running on the same circuit. Use a heavy-duty extension cord only if absolutely necessary, and make sure it is rated for the amperage of your press.
Ventilation is another critical safety consideration. While modern HTV materials are generally low in fumes, the process of heating plastics and fabrics can release volatile organic compounds (VOCs) into the air. Working in a poorly ventilated room for hours can lead to headaches and other health issues. At a minimum, work in a room with an open window or a fan to circulate the air. An air purifier with a carbon filter can also be a valuable addition to your workspace.
Finally, the press itself is a burn hazard. The platen reaches temperatures of up to 400°F (205°C). Always be mindful of where the hot platen is. This is a primary reason many beginners and professionals favor swing-away or drawer-style presses, as they move the heat source away from the work area. Keep flammable materials away from the press and never leave it unattended while it is on.
The Ergonomics of Workflow
Ergonomics is the science of designing a workspace to fit the user, not forcing the user to fit the workspace. A good ergonomic setup reduces strain on your body and increases efficiency.
Your heat press should be placed on a sturdy, stable, and heat-resistant surface. A flimsy folding table is not a safe option. A heavy-duty workbench or a reinforced metal cart is a much better choice. The height of this surface is also important. It should be at a height that allows you to operate the press without hunching over or reaching up uncomfortably. For a manual clamshell press, you need to be able to apply leverage to the handle, so a slightly lower-than-waist-height table is often ideal.
Arrange your tools and materials in a logical sequence. Consider a U-shaped or L-shaped layout. You might have your computer and vinyl cutter on one leg of the L, a weeding station in the corner, and your heat press and blank garments on the other leg. This keeps everything within arm's reach.
Invest in good lighting. You need to be able to see clearly when you are weeding intricate designs and when you are aligning them on the garment. A bright overhead light supplemented by a task lamp at your weeding station can prevent eye strain and mistakes.
A small detail that makes a big difference is having a "heat-resistant pad" or a designated spot to place your heated accessories, like a heat pillow or a pressing pad, when they are not in use. You also need a space for finished items to cool down before they are folded and packaged.
Organization is Key
A cluttered workspace leads to a cluttered mind and inefficient production. Implement a system for organizing your materials.
- HTV Storage: Store your heat transfer vinyl flat or in rolls. There are many DIY and commercial solutions, from simple filing cabinets with labeled folders for each color to wall-mounted roll racks. Keep your scraps in a labeled bin or folder; small pieces are perfect for small logos or multi-color designs.
- Substrate Storage: Keep your blank t-shirts, mugs, and other items clean and organized. Storing shirts in clear plastic bins, sorted by size and color, makes it easy to grab what you need.
- Tool Storage: Have a designated home for your weeding tools, scissors, heat-resistant tape, rulers, and other accessories. A pegboard on the wall above your workbench is a classic and effective solution.
A well-organized space saves you time and reduces stress. You will not waste precious minutes searching for a specific color of vinyl or the right-sized t-shirt. This is one of those heat press startup tips that pays dividends every single day you work.
From Hobby to Enterprise: Building a Sound Business Foundation
Owning a heat press and knowing how to use it are technical skills. Turning those skills into a profitable business requires a different, yet equally important, set of abilities. It involves thinking like an entrepreneur. You must develop a plan for how you will find customers, price your products, and manage your finances. Without this business foundation, even the most talented artist can struggle to achieve commercial success. Starting a t-shirt business is an accessible goal, as pointed out by industry leaders like Stahls', but it requires a strategic approach (Stahls', 2025c).
Let us approach this not as a chore, but as an act of creative architecture. You are building the structure that will support your artistic work and allow it to flourish. A solid business plan is your blueprint. It does not need to be a hundred-page formal document, but it should outline your goals and your strategies for achieving them.
Finding Your Niche
One of the most common mistakes a new business makes is trying to be everything to everyone. The market for "custom t-shirts" is vast and crowded. A more effective strategy is to identify a specific niche—a targeted group of customers with a shared interest or need.
Think about your own passions and your local community. Are you a fitness enthusiast? You could specialize in custom apparel for local gyms, yoga studios, and running clubs. Do you love pets? A business focused on personalized items for pet owners could be very successful. Other potential niches include:
- Local Businesses: Uniforms, promotional shirts, and event apparel for small businesses in your area.
- Schools and Teams: Spirit wear for local schools, uniforms for youth sports leagues, and gear for clubs.
- Special Events: T-shirts for family reunions, bachelor/bachelorette parties, and charity fundraisers.
- Hobbies and Interests: Apparel for car clubs, gaming communities, book lovers, or gardening groups.
- Personalized Gifts: Focusing on one-of-a-kind items for birthdays, holidays, and anniversaries, which works especially well if you have a combo heat press machine.
By focusing on a niche, you can tailor your marketing messages, your designs, and your product offerings to a specific audience. It becomes easier to establish yourself as the "go-to" person for that particular need. Your marketing becomes more effective because you know exactly who you are talking to.
The Critical Calculation: Pricing Your Products
Pricing can be one of the most intimidating aspects of starting a business. Price too low, and you devalue your work and may not even cover your costs. Price too high, and you may struggle to attract customers. A solid pricing strategy is based on a clear understanding of your costs.
Your price should cover three things:
- Cost of Goods Sold (COGS): This is the direct cost of the materials used to make the product. It includes the blank garment, the heat transfer material, and any other consumables like transfer tape or parchment paper. Be precise. If a sheet of HTV costs $3 and you use half of it for a design, your material cost for the vinyl is $1.50.
- Labor: Your time is valuable. You must pay yourself for the time it takes to design, cut, weed, press, and package the item. Decide on a reasonable hourly rate for yourself and calculate the labor cost for each product. Even if you start at a modest rate, accounting for your labor ensures you are building a sustainable business model.
- Profit and Overhead: This is the portion of the price that covers your indirect business expenses (overhead) and provides you with a profit. Overhead includes things like the cost of your equipment, software subscriptions, marketing expenses, and utilities. The profit is what allows your business to grow.
A common formula is: Price = (Cost of Blank + Cost of Materials) x 2 + Labor Cost
The "x 2" is a simplified way to account for profit and overhead. You can adjust this multiplier based on your market and the perceived value of your product. A highly unique, complex design can command a higher price than a simple text-based shirt. Do not be afraid to charge what your work is worth. Research what similar businesses in your niche are charging to get a sense of the market rate, but do not simply copy their prices. Base your pricing on your own costs and value.
Marketing Your New Venture
You can make the best products in the world, but if no one knows you exist, you will not make any sales. Marketing is the process of telling your story and connecting with your target customers.
In today's world, a strong online presence is vital.
- Social Media: Create professional-looking profiles on platforms where your target audience spends their time (like Instagram, Facebook, or TikTok). Post high-quality photos and videos of your products. Show your process. Tell the story behind your designs. Engage with your followers and build a community.
- E-commerce Platform: A simple online store on a platform like Shopify, Etsy, or a local equivalent allows customers to browse your products and place orders easily.
- Local Online Groups: Facebook groups for local communities, parents, or small businesses can be a great place to introduce your services.
Do not neglect offline marketing, especially if your niche is local.
- Networking: Attend local markets, craft fairs, and community events. Wear your own products. Talk to people about what you do.
- Business Cards and Flyers: Have professional-looking business cards on hand at all times.
- Partnerships: Collaborate with other local businesses. A local gym might be happy to display your flyers in exchange for you offering a discount to their members.
One of the best marketing tools is a satisfied customer. Provide excellent service, deliver a high-quality product, and people will not only come back but will also tell their friends. Word-of-mouth marketing is powerful and free. A business that stands behind its work, like the one described on this company profile, builds the trust necessary for long-term success.
The Art of Repetition: Practice, Testing, and Meticulous Documentation
There is a common misconception among those new to heat pressing that it is a simple, plug-and-play operation. You buy a machine, look up some numbers online, and produce perfect shirts every time. The reality, as any seasoned professional will attest, is that heat pressing is a craft that demands practice and precision. It is more like a science experiment than a vending machine. Every new combination of material, fabric, and design is a new variable. The key to moving from a beginner to an expert is a disciplined approach to practice, testing, and documentation.
Think of yourself as a scientist in a lab. Your goal is to find a repeatable process that yields a consistent, high-quality result. You would not just mix chemicals randomly; you would follow a procedure, observe the results, and take detailed notes. This same methodology is one of the most effective heat press startup tips for long-term success. It is the process that builds confidence and eliminates costly errors.
The Power of the Test Press
Before you ever press a design onto that final, expensive hoodie your customer ordered, you must perform a test press. This is non-negotiable. Suppliers' recommended settings for time, temperature, and pressure are excellent starting points, but they cannot account for every variable. Your heat press may run slightly hotter or colder than its display indicates. The specific dye used in a garment might react differently to heat. The ambient humidity in your workshop can even play a role.
Your test press should ideally be done on the exact same type of fabric, or even better, on a sacrificial item of the same kind. If you are pressing a batch of 50 shirts, it is worth sacrificing one shirt to dial in your settings perfectly. For smaller orders, use fabric swatches or a "butcher shirt"—an old shirt of the same material that you use for testing.
During your test, you are checking for several things:
- Adhesion: Does the transfer adhere completely? Try to pick at a corner. Does it lift easily?
- Scorching or Discoloration: Is there any yellowing or discoloration on the fabric around the design? This is especially important for polyester and light-colored fabrics.
- Weed Line Impressions: Does the press leave an impression from the edge of the HTV carrier sheet? If so, your pressure might be too high or your temperature too hot.
- The "Wash Test": The ultimate test of a good press is how it holds up in the wash. Wash and dry your test garment according to the care instructions. Did the vinyl peel, crack, or fade? Did the colors in the sublimation print lose vibrancy? A successful wash test is your green light for production.
Creating Your "Recipe Book"
Every time you achieve a perfect press after testing, you must document the exact settings you used. This is your "recipe book," and it will become one of your most valuable business assets. This record saves you from having to re-test the same material combination in the future, saving time, materials, and money.
Your documentation should be detailed. Do not just write "Blue HTV on Cotton Shirt." A good entry would look like this:
- Project: Local Soccer Team Shirts
- Substrate: Brand X, Model 123, 100% Polyester Performance Tee, Color: Royal Blue
- Transfer Material: Brand Y, Stretch HTV, Color: White
- Temperature: 305°F / 152°C
- Time: 12 seconds
- Pressure: Medium (described as "two-hand close, firm but not forced")
- Peel: Hot Peel (remove carrier sheet immediately)
- Notes: Pre-pressed shirt for 5 seconds to remove moisture. Used a teflon sheet. No scorching observed. Passed wash test with no peeling.
You can keep this log in a physical notebook, a spreadsheet on your computer, or a notes app on your phone. The format does not matter as much as the consistency and detail. This recipe book allows you to replicate your successes with scientific precision. When a customer returns six months later wanting a re-order, you can produce an identical product with confidence.
Understanding Peel Temperature: Hot, Warm, or Cold?
One detail that is often overlooked by beginners is the peel temperature. After you have pressed the design, the clear carrier sheet on the HTV must be removed. Some vinyls are designed to be "hot peel," meaning you should remove the carrier sheet immediately after the press opens. Others are "cold peel," requiring you to wait until the garment and transfer have cooled down completely before removing the carrier. Some are "warm peel," falling somewhere in between.
This is not a matter of preference; it is a chemical property of the adhesive. Peeling a cold peel vinyl while it is still hot can cause the design to lift, stretch, or wrinkle because the adhesive has not had time to set. Peeling a hot peel vinyl after it has cooled can make the carrier sheet difficult to remove and may result in an uneven finish.
Always check the manufacturer's instructions for the recommended peel temperature for your specific HTV. This small detail can be the difference between a smooth, professional finish and a ruined garment. Your recipe book should always include the peel type for each material you use. Mastering these nuances is a hallmark of a true professional.
Expanding Your Craft: A Deeper Look at Heat Transfer Technologies
Once you have mastered the fundamentals of applying standard HTV, a whole new world of creative possibilities opens up. The heat press is a uniquely versatile tool, capable of working with a wide range of transfer technologies beyond basic vinyl. Diversifying your offerings by learning these different methods can set your business apart from the competition, allowing you to cater to a wider range of customer needs and artistic visions. Exploring a general resource like a main company page can often reveal the breadth of equipment available for these different methods.
Let us explore some of the most popular and impactful technologies you can integrate into your heat press business. Each has its own unique characteristics, benefits, and applications. Understanding these differences will empower you to recommend the best possible solution for your client's project.
Screen Printed Transfers: The Best of Both Worlds
Imagine the quality and feel of traditional screen printing but without the messy inks, complex screen preparation, and large space requirements. That is the advantage of screen printed transfers.
These transfers are created by a professional screen printing company. They screen print your design using high-quality plastisol inks onto a special release paper. You then order these transfers in bulk. When you get an order, you simply take one of the pre-made transfers and apply it to a garment using your heat press. The application process is incredibly fast, often taking less than 10 seconds.
This method offers several key advantages:
- Quality and Feel: The final product has the classic soft feel and durability of a direct screen print.
- Efficiency: It is extremely fast for fulfilling orders. There is no cutting or weeding involved. Just position the transfer and press.
- Cost-Effective for Volume: While there is an upfront cost to order the transfers (often with a minimum quantity), the per-piece cost can be very low for designs you sell frequently. It is perfect for a popular logo or a best-selling design.
- Full Color and Detail: This method can handle very fine details and full-color photographic prints (depending on the type of transfer ordered) that would be impossible or incredibly tedious to achieve with layered HTV.
Screen printed transfers are an ideal solution for businesses that have a few core designs that they produce in medium to high volumes. It bridges the gap between the one-off flexibility of HTV and the mass-production efficiency of traditional screen printing.
Direct to Film (DTF) Transfers: The New Frontier
Direct to Film, or DTF, is a relatively new technology that has taken the garment decoration industry by storm. It has quickly become a favorite for its versatility and stunning results.
The DTF process involves using a special printer to print a design directly onto a sheet of PET film. A powdered adhesive is then applied to the back of the wet ink. The film is cured, and the result is a ready-to-apply transfer. You can then apply this transfer to virtually any type of fabric using your heat press.
The benefits of DTF are truly game-changing:
- Fabric Versatility: Unlike sublimation, DTF works on almost any fabric, including 100% cotton, polyester, blends, nylon, and even leather, in any color, from white to black.
- Full-Color, Vibrant Prints: DTF printers use a white ink base, which allows for incredibly bright, opaque, and vibrant full-color designs, even on dark garments. The quality can be near-photographic.
- Excellent Feel and Stretch: High-quality DTF transfers are remarkably thin and flexible. They have a soft feel and excellent stretchability, making them suitable for performance wear.
- No Weeding: Like screen printed transfers, there is no cutting or weeding involved, which drastically speeds up production for complex, multi-color designs.
You can either invest in a DTF printing system yourself (which is a significant investment in equipment and maintenance) or, more commonly for startups, you can order custom DTF transfers from a print service. You simply upload your design, and they ship you the ready-to-press transfers. This "gang sheet" approach, where you fit multiple designs onto a single large sheet, is an incredibly cost-effective way to produce a variety of full-color designs. This is a powerful heat press startup tip for those wanting to offer complex graphics without the labor of layering vinyl.
Printable Heat Transfer Vinyl
Another way to achieve full-color designs is with printable heat transfer vinyl. This method involves using a solvent or eco-solvent inkjet printer (a different type of printer than a standard desktop model) to print directly onto a special, printable version of HTV.
After printing, the design is typically run through a vinyl cutter to contour cut around the edges. Then, you must "mask" the design by applying a sheet of high-tack transfer tape, which lifts the printed design off its original carrier. Finally, you can press the masked design onto your garment.
Printable HTV offers great-looking, full-color results. However, the process is more labor-intensive than using DTF or screen printed transfers due to the need for contour cutting and masking. The equipment (a solvent printer/cutter) also represents a significant investment. For many startups, ordering DTF transfers provides a more accessible entry point into the world of full-color printing. However, for a business that wants full, in-house control over the printing process, a printer/cutter setup is a powerful, long-term asset.
By understanding these advanced methods, you can elevate your business from a simple t-shirt shop to a full-service custom decoration studio. You can confidently advise a client that while their simple, one-color logo is perfect for HTV, their complex, multi-color artistic design would be better served by a DTF transfer, ensuring they get the best possible product for their needs.
Frequently Asked Questions (FAQ)
Q1: What is the best type of heat press for a beginner? For a beginner focused on versatility and safety, a swing-away or drawer-style press is often recommended. A 15×15 inch (38×38 cm) platen is a great starting size. A quality combo heat press machine is also an excellent choice if you want to experiment with mugs, hats, and plates from the start without buying multiple machines.
Q2: Can I use a regular home iron instead of a heat press? While you can technically apply some "iron-on" materials with a home iron, it is not recommended for a professional business. A home iron cannot provide the consistent, even temperature or the firm, measurable pressure required for durable, commercial-quality applications. Transfers applied with an iron are very likely to peel after washing.
Q3: Why is my vinyl peeling off after I wash the shirt? This is the most common issue for newcomers and is almost always caused by an error in one of the three pillars: time, temperature, or pressure. The most likely cause is insufficient pressure, preventing the adhesive from properly bonding with the fabric. Other causes include the temperature being too low or the pressing time being too short. Always follow the material manufacturer's instructions and perform a wash test.
Q4: What's the difference between HTV and sublimation? HTV (Heat Transfer Vinyl) is a physical layer of material that sits on top of the fabric. It can be applied to many fabric types and colors. Sublimation is a dyeing process where ink turns to gas and bonds with polyester fibers. It has no feel but only works on white or light-colored 100% polyester materials.
Q5: Do I need a special printer for heat transfers? It depends on the method. For HTV, you need a vinyl cutter, not a printer. For sublimation, you need a dedicated sublimation printer with sublimation inks and paper. For DTF (Direct to Film) or printable HTV, you need a specialized eco-solvent or DTF printer.
Q6: How do I avoid scorching light-colored shirts? To avoid scorching, lower your temperature and time slightly if possible. Use a protective cover sheet, such as a Teflon sheet or parchment paper, between the heat platen and your garment. Also, ensure your press's temperature is accurate by using an infrared temperature gun. Pre-pressing can also help remove chemicals from the manufacturing process that can cause discoloration.
Q7: Can I press on items with zippers or buttons? Yes, but you need to account for the uneven surface. A large press platen will be held up by the zipper or button, preventing proper pressure on the rest of the design. The solution is to use a heat press pillow or a flexible printing pad. You place the pillow inside the garment, which allows the zipper or seam to sink into the pillow, creating a firm, even surface for the transfer area.
Conclusion
Embarking on the path of a heat press entrepreneur in 2025 is to engage in a craft that beautifully merges technology with artistry. It is a journey that begins not with the first sale, but with the foundational understanding of the tools, materials, and principles that govern this creative process. Success is not born from a single moment of inspiration, but cultivated through a disciplined and empathetic approach—empathy for the materials you work with, for the customers you serve, and for yourself as a learner and business owner.
We have traversed the critical landscape, from the initial, pivotal decision of selecting the right heat transfer machine to the nuanced dance of time, temperature, and pressure. We have explored the vibrant world of materials and the necessity of creating a workspace that is both a sanctuary for creativity and a bastion of safety. Building a business is about more than just making things; it is about creating value, solving problems for a chosen niche, and constructing a sustainable enterprise through careful planning and pricing. The practice of testing, of documenting your successes in a personal "recipe book," is what transforms hopeful ambition into reliable expertise. These heat press startup tips are not rigid rules, but guiding principles to help you navigate the inevitable challenges and discover your own unique voice in the world of custom creation. The machine is your instrument, but you are the artisan. With patience, practice, and a perpetual curiosity, you have the capacity to build something truly remarkable.
References
Heat Press Nation. (2025). Heat press 101. Heat Press Nation.
Mertes, A. (2020, July 23). Inside the heat press & heat transfer printing process. Quality Logo Products. https://www.qualitylogoproducts.com/promo-university/what-is-heat-press-transfer.htm
Stahls'. (2025a). How to become a heat printer.
Stahls'. (2025b). Heat printing material/fabric selection chart. https://www.stahls.com/heat-transfer-material-fabric-chart?srsltid=AfmBOorU2KLPwtB5ZkEABg-Wkr1YApbbml2bU_phn8ZCgmf5oMc8-pJQ
Stahls'. (2025c). How to start a t-shirt business with a heat press. https://www.stahls.com/adding-heat-press-business?srsltid=AfmBOorJkB-awuFC9NitlBxZc3ec2_8bSgIL-6XyKE9MYtjZoldRUyYu
Target Transfers. (2022, December 7). Heat transfer press | Top 10 application tips. https://heat-transfers.uk/guides/heat-transfer-press-application-tips/

