.png)
.png)

A Practical 5-Step Guide: How to Make Heat Press Transfers in 2025
October 30, 2025
Abstract
The process of creating custom heat press transfers is a multifaceted endeavor, bridging digital design with material science and thermal application. This document examines the methodologies for producing these transfers, focusing on three predominant techniques in 2025: Direct-to-Film (DTF), dye-sublimation, and heat transfer vinyl (HTV). It provides a systematic, five-step framework that guides a creator from the initial design conceptualization to the final post-press care of the finished product. An analysis of the necessary equipment, including specialized printers, cutters, and various types of heat press machines, is presented. The investigation delves into the specific material requirements for each method, evaluating the interplay between inks, transfer media, and substrates like textiles and ceramics. The guide emphasizes the critical parameters of time, temperature, and pressure, explaining their scientific basis and practical impact on transfer quality and durability. By exploring common challenges and their solutions, this work aims to equip both novices and experienced professionals with the comprehensive knowledge required to produce consistent, high-quality, and durable custom products.
Key Takeaways
- Select the transfer method (DTF, sublimation, vinyl) based on your project's fabric and color.
- Prepare high-resolution digital files, mirroring the design when necessary for the specific process.
- Calibrate your heat press machine for accurate temperature, time, and pressure settings.
- Always pre-press your garment to remove moisture and wrinkles for a flawless application.
- Follow specific post-press care instructions to ensure the transfer's longevity and vibrancy.
- Mastering how to make heat press transfers requires patience and attention to detail.
- Properly test your settings on scrap material before committing to the final product.
Table of Contents
- Foundational Concepts: Understanding Heat Transfers Before You Begin
- Step 1: Conceptualization and Digital Design
- Step 2: Selecting and Preparing Your Materials
- Step 3: The Production Process: Printing, Cutting, and Weeding
- Step 4: The Main Event: The Heat Pressing Process
- Step 5: Post-Press Care and Quality Control
- Advanced Techniques and Business Considerations
- Frequently Asked Questions (FAQ)
- Conclusion
- References
Foundational Concepts: Understanding Heat Transfers Before You Begin
Before one can embark on the practical steps of creation, it is beneficial to establish a firm conceptual grounding. To learn how to make heat press transfers is not merely to follow a recipe; it is to understand a dialogue between image, medium, and object. This initial exploration examines the fundamental nature of a heat transfer, the physical forces that govern its success, and the motivations that might compel an individual or enterprise to pursue this craft.
What is a Heat Transfer? A Simple Analogy
At its core, a heat transfer is a carrier for a design, a temporary home for an image before it is moved to its final destination. Imagine you have written a message in wet ink on a piece of paper. If you press a second, blank piece of paper firmly against the first, some of the ink will transfer, creating a mirrored, perhaps faint, copy. Now, let us refine this idea. What if the "ink" was not ordinary ink but a special kind that, when heated, releases from the first paper and permanently bonds to a new surface?
This is the essence of a heat transfer. The transfer itself—be it a sheet of vinyl, a printed sublimation paper, or a DTF film—is the first piece of paper. It holds the design in a stable, pre-arranged form. The T-shirt, mug, or hat is the blank surface. The heat press machine provides the necessary heat and pressure to command the design to release from its carrier and adhere to the substrate. The specific "ink" or material used determines the character of this bond, influencing its feel, appearance, and endurance. This process allows for the application of intricate, multi-colored designs onto various surfaces with a consistency and quality that would be difficult to achieve by direct painting or drawing.
The Core Triad: Time, Temperature, Pressure
The success of every single heat press application rests upon the precise calibration of three interdependent variables: temperature, time, and pressure. Thinking of these as the three legs of a stool is a useful mental exercise. If one is too long or too short, the entire structure becomes unstable, and the result is compromised. Neglecting the interplay of this triad is the most common source of failure for beginners.
Temperature: Heat is the catalyst. It is the energy that activates the process. In the case of heat transfer vinyl (HTV), the heat softens a layer of adhesive on the back of the vinyl, allowing it to flow and grip the fibers of the fabric. For sublimation, the role of temperature is even more dramatic. It must be high enough—typically between 190°C to 205°C (375°F to 400°F)—to cause the solid dye particles on the paper to convert directly into a gas, a process known as sublimation. This gas then permeates the polyester fibers of the substrate, which have opened like pores in response to the heat. As it cools, the gas turns back into a solid, now permanently trapped within the fiber itself. For DTF transfers, heat serves a dual purpose: it melts the adhesive powder on the back of the transfer, bonding it to the garment, while also curing the water-based inks. Each type of transfer has a specific temperature window for optimal application, a detail specified by the manufacturer. Too little heat results in a weak bond; too much can scorch the fabric or damage the transfer itself.
Time: This variable dictates the duration for which the heat and pressure are applied. It is the window of opportunity during which the chemical or physical bonding must occur. If the time is too short, the transfer may not fully adhere or, in the case of sublimation, the color may not fully develop, resulting in a faded appearance. If the time is too long, it can lead to overheating issues similar to those from excessive temperature, such as discoloration of the substrate or a "halo" effect around the design where the adhesive has spread too far. The required time is often linked to the temperature; a slightly lower temperature might require a slightly longer press time to achieve the same result.
Pressure: Pressure ensures intimate contact between the transfer, the substrate, and the heat source. Without even and consistent pressure, heat cannot be distributed uniformly across the design. This can lead to patches where the transfer has not adhered properly. Imagine trying to glue two pieces of wood together. If you only press on the center, the edges will not bond. A heat press machine functions on the same principle. Its job is to apply a specific, even pressure—described as light, medium, or firm—across the entire surface area of the platen. The type of pressure needed varies. Thicker items like sweatshirts may require firmer pressure to ensure the heat penetrates, while some delicate transfers might need lighter pressure to avoid creating a heavy, undesirable texture on the garment. A quality heat press machine, such as a clamshell or swing-away model, is defined by its ability to deliver this consistent pressure, a feat that a simple home iron cannot replicate (Stahls', 2025).
Why Make Your Own Transfers? Control, Creativity, Cost
The decision to produce heat transfers in-house rather than purchasing pre-made ones from a supplier is a significant one, driven by a desire for greater autonomy and potential economic benefit.
First, consider the element of control. When you create your own transfers, you gain complete sovereignty over the entire production chain. You are not limited by a supplier's catalog of designs, colors, or sizes. If a client requests a highly specific Pantone color or a unique glitter effect, you have the direct capability to attempt to fulfill that request. This allows for rapid prototyping and on-demand production. An idea conceived in the morning can be a finished product by the afternoon, a level of agility that is impossible when waiting for a shipment. You control the quality at every stage, from the resolution of the initial digital file to the final press.
Second, the potential for creativity expands exponentially. Making your own transfers opens the door to experimentation with different media, layering techniques, and unique combinations. You can mix a matte vinyl with a metallic one, or place a vinyl design over a sublimated background on the right garment. This is how unique, signature styles are born. It transforms the act of decoration from simple application to genuine artistry. For a small business, this unique creative capacity is a powerful differentiator in a crowded market.
Finally, there is the matter of cost. While there is an initial investment in equipment—a printer, perhaps a vinyl cutter, and the heat press machine itself—the per-unit cost of producing a transfer in-house is typically much lower than purchasing it pre-made. The raw materials, such as blank vinyl rolls, transfer paper, and inks, are bought in bulk, and the value is added through your labor and creative input. Over time, this cost saving can be substantial, leading to higher profit margins or the ability to offer more competitive pricing to your customers. This economic advantage is a primary driver for many who invest in the technology to learn how to make heat press transfers.
Step 1: Conceptualization and Digital Design
The journey of a thousand presses begins with a single design. This initial phase is purely digital, yet it lays the entire foundation for the physical product. The choices made here—the method, the software, the file preparation—will dictate the quality, appearance, and feasibility of the final transfer. A flawed design file can never be rescued by a perfect press.
Choosing Your Transfer Method: A Comparative Analysis (DTF vs. Sublimation vs. Vinyl)
Before a single pixel is placed, the most fundamental decision must be made: which transfer technology will be used? As of 2025, the three most accessible and popular methods for in-house production are Direct-to-Film (DTF), dye-sublimation, and heat transfer vinyl (HTV). Each has a distinct personality, with its own strengths, weaknesses, and material requirements. Choosing the right one is about aligning the technology with the intended product. What are you making, and for whom?
Direct-to-Film (DTF): This is the versatile all-rounder. DTF involves printing a design using specialized water-based inks onto a clear PET film. A powdered adhesive is applied to the wet ink, then cured with heat. The resulting transfer can be applied to a vast array of fabrics, including cotton, polyester, blends, leather, and nylon, in any color. Because it prints a white ink underbase, DTF can produce vibrant, full-color images even on black or dark-colored garments. The final transfer sits on top of the fabric, having a soft, flexible feel that is more durable and stretchable than traditional transfer paper. It is an excellent choice for detailed, multi-color graphics and photorealistic images.
Dye-Sublimation: This is the method of infusion. Sublimation is a chemical process where a solid turns directly into a gas, bypassing the liquid phase. In this method, special sublimation inks are printed onto a carrier paper. When heat and pressure are applied, the ink turns into a gas and permeates the surface of the substrate, bonding with the material at a molecular level. The result is a transfer with zero feel, or "hand," because the ink is in the material, not on it. It is impossibly durable, incapable of cracking, peeling, or fading as long as the substrate itself is intact. However, sublimation has a crucial limitation: it only works on polyester materials (or items with a special polymer coating) and it is not opaque. The dye blends with the color of the fabric, meaning it can only be used on white or very light-colored substrates for the colors to appear true.
Heat Transfer Vinyl (HTV): This is the method of cutting and layering. HTV is a material that comes in rolls or sheets with a heat-activated adhesive on one side. A design is cut into the vinyl using a plotter or vinyl cutter, and the excess material is removed in a process called "weeding." The design is then pressed onto the garment. HTV is ideal for simpler, solid-color designs, text, and logos. It comes in a staggering variety of finishes—matte, gloss, glitter, flock, metallic, holographic, and more. While multi-color designs are possible by layering different colors of vinyl, it can become bulky and time-consuming for highly complex images. It can be applied to many fabrics, including cotton and polyester.
To help clarify this choice, consider the following comparison:
| Feature | Direct-to-Film (DTF) | Dye-Sublimation | Heat Transfer Vinyl (HTV) |
|---|---|---|---|
| Compatible Fabrics | Cotton, Polyester, Blends, Leather, Nylon | 100% Polyester or high-poly blends | Cotton, Polyester, Blends |
| Fabric Color | Any color (including black/dark) | White or very light colors only | Any color |
| Feel on Garment | Soft, flexible, sits on top | Zero feel (ink is infused into fabric) | Varies by type, sits on top |
| Image Complexity | Excellent for photos, gradients, details | Excellent for photos, gradients, details | Best for solid colors, text, logos |
| Durability | Very good, flexible and stretch-resistant | Excellent, permanent, cannot crack/peel | Good to very good, depends on type/application |
| Initial Investment | High (DTF printer, powder, curing oven) | Moderate (Sublimation printer, inks) | Low to Moderate (Vinyl cutter) |
| Process Steps | Print -> Powder -> Cure -> Press | Print -> Press | Cut -> Weed -> Press |
Software for Success: From Free Tools to Professional Suites
Once the method is chosen, the design itself must be created. The software used for this is the digital workbench. The options range from free, browser-based applications to industry-standard professional software.
For beginners or those on a tight budget, tools like Canva or GIMP offer a surprising amount of power. They can be used to create text-based designs, combine simple shapes, and prepare images for printing. However, they may lack the advanced features needed for complex vector work or precise color management, which can be a limitation for professional applications.
The industry standards for design are Adobe Illustrator and CorelDRAW. These are vector-based programs, which means they create designs using mathematical equations rather than pixels. This is a critical distinction. A vector graphic can be scaled to any size—from a small chest logo to a giant banner—without any loss of quality or sharpness. This is particularly vital for HTV, where the vinyl cutter follows the vector paths to cut the design. For DTF and sublimation, where raster (pixel-based) images like photographs are common, Adobe Photoshop is the tool of choice. Professional designers often use both Illustrator and Photoshop in tandem: Illustrator for logos and text, and Photoshop for image manipulation and color correction.
Regardless of the software chosen, the goal is to create a clean, well-constructed digital file that will translate effectively to the physical world.
Design Principles for Flawless Transfers
Creating a design for a heat transfer is not the same as creating a design for a website or a social media post. The physical nature of the medium imposes certain constraints and requires specific considerations.
Simplicity and Readability: Especially with HTV, overly intricate designs with extremely thin lines or tiny, isolated pieces can be a nightmare to cut and weed. Think about the physical process. A person will have to use a small hook to pull away all the negative space. If the text is too small or the lines too fine, the vinyl may tear or lift off the carrier sheet during weeding. A good rule of thumb is to ensure all parts of the design are thick enough to be physically stable.
Color Management: What you see on your backlit computer monitor is not what you will get on a printed garment. Monitors use an RGB (Red, Green, Blue) color model, while printers use a CMYK (Cyan, Magenta, Yellow, Black) model. For DTF and sublimation printing, it is best to design in the CMYK color space from the beginning to get a more accurate preview of the final colors. Using color profiles (like an ICC profile specific to your ink and paper combination) can further improve color accuracy, ensuring that the vibrant red on your screen does not turn into a dull orange on the shirt.
Negative Space: A successful design is not just about what you add, but also about the space you leave empty. In garment decoration, the shirt itself is part of the canvas. A well-placed design with ample negative space can look more professional and impactful than a crowded, busy graphic that covers the entire chest.
Preparing Your File: Resolution, Color Modes, and Mirroring
The final step in the digital phase is preparing the file for output. This is a technical checkpoint to ensure the digital blueprint is correct.
Resolution: For any design that includes raster elements (like photos for sublimation or DTF), the resolution is paramount. The standard for high-quality printing is 300 DPI (dots per inch). This means that for every inch of the final printed design, there are 300 dots of information. Using a low-resolution image (like one saved from a website at 72 DPI) will result in a blurry, pixelated, and unprofessional-looking transfer. Always start with the highest quality source image possible.
File Format: The ideal file format depends on the process. For HTV cutting, a vector format like SVG, AI, or EPS is required. For DTF and sublimation printing, a high-resolution PNG with a transparent background is often best, as it allows the shirt color to show through where there is no design. A high-quality JPEG can also be used, but it will not support transparency.
Mirroring: This is a simple but critically easy mistake to make. Imagine the transfer process again. You are placing the design face-down onto the substrate. Therefore, for most types of transfers (including sublimation and most HTV), the design must be horizontally flipped, or mirrored, in the software before printing or cutting. If you forget to do this, all text and asymmetrical logos will appear backward on the final product. Some printer drivers have a "mirror image" checkbox that automates this, but it is a good habit to do it manually in the design software to be certain. The notable exception is DTF, where the design is printed right-reading on the film, as the transfer process involves a different layering sequence. Always double-check the specific requirements for your chosen media.
Step 2: Selecting and Preparing Your Materials
With a perfected digital design in hand, the focus shifts to the tangible world. The materials chosen will form the physical body of the final product. The quality of these components—the transfer medium, the substrate, the inks, and the tools—is just as important as the quality of the design file. Using premium materials is an investment in a premium outcome.
The Anatomy of Transfer Media: Paper, Film, and Vinyl
The transfer medium is the carrier, the temporary vessel for your design. Each type is engineered for its specific process.
Sublimation Paper: This is not just any paper. It is a specialized paper with a unique coating designed to hold the sublimation ink droplets on its surface. During the heat press process, this coating releases the ink as a gas with maximum efficiency. Using regular copy paper will result in a significant amount of ink being absorbed into the paper fibers, leading to a dull, faded transfer because not enough ink is released onto the substrate. Quality sublimation paper has a high transfer rate (often over 95%), meaning most of the ink makes it to the final product, resulting in vibrant, saturated colors. These papers often have a watermark or colored backing to help you identify the printing side.
DTF Film: Direct-to-Film uses a specific type of Polyethylene Terephthalate (PET) film. These films are typically around 0.75mm thick and are treated with a coating that allows them to accept the water-based DTF inks and hold their shape under the heat of the curing process. DTF films come in two main varieties: hot peel and cold peel. This refers to when the film should be removed from the garment after pressing. Hot peel films can be removed immediately, which can speed up production. Cold peel films must be allowed to cool down completely before removal, which often results in a slightly more matte and durable finish. The choice between them depends on workflow preference and the desired final look.
Heat Transfer Vinyl (HTV): HTV is a more complex material, typically composed of several layers. On the bottom is the heat-activated adhesive. Above that is the vinyl material itself, which provides the color and finish. On top is a clear, often sticky, carrier sheet. The carrier sheet holds all the separate pieces of your cut design in place after weeding, allowing you to position it correctly on the garment. After pressing, this carrier sheet is peeled away, leaving only the vinyl design. The sheer variety of HTV is astounding, from standard polyurethane materials known for their softness and stretchability to thick, textured materials like flock (which has a fuzzy, suede-like feel) or glitter vinyl packed with metallic flakes.
Substrate Science: Choosing the Right Fabric or Material
The substrate is the final destination for your design. Its composition is a determining factor in which transfer methods are viable and what the final result will look like.
For Sublimation: The rule is strict and simple: polyester is king. The sublimation process is a molecular bond between the dye gas and polyester fibers. One hundred percent polyester fabrics, like those used in athletic apparel, will produce the most vibrant and photographic results. Polyester blends (e.g., 50% polyester, 50% cotton) can be used, but the result will be a more faded, "vintage" look, as the dye will only bond to the polyester fibers and will wash out of the cotton fibers. Sublimation does not work on 100% cotton at all. Beyond apparel, this method is used for a wide range of polymer-coated hard goods, often called "sublimation blanks." This includes ceramic mugs, aluminum photo panels, phone cases, and mousepads, all of which have been treated with a special polyester coating to receive the sublimation dye. This versatility is a major strength of the process, and a mug press machine is a common addition to a sublimation setup.
For DTF and HTV: The options are much broader. Both DTF and HTV apply a layer that sits on top of the fabric, so they are not dependent on the fabric's chemical composition in the same way sublimation is. They work excellently on 100% cotton, 100% polyester, and a wide range of poly/cotton blends. This makes them the go-to choice for decorating standard cotton T-shirts, hoodies, and canvas tote bags. They can also be applied to less conventional materials like denim, canvas, and even some types of leather or nylon (though specialized vinyl may be required for heat-sensitive materials like nylon). The key is to ensure the material can withstand the heat required for application without scorching or melting.
When choosing a garment, consider not only its material but also its texture. A very heavily textured fabric, like a ribbed knit or a coarse canvas, can make it difficult for the transfer's adhesive to make full, even contact, potentially compromising the bond. Smoother fabrics generally produce better results.
Essential Tools Beyond the Press: Printers, Cutters, and Weeding Tools
While the heat press is the star of the show, it is supported by a cast of essential equipment that handles the production of the transfer itself.
Printers:
- Sublimation Printers: These are typically inkjet printers (from brands like Epson or Sawgrass) that are either purpose-built for sublimation or have been converted to use only sublimation inks. It is critical that a printer used for sublimation is dedicated solely to that purpose; you cannot switch between regular ink and sublimation ink in the same machine, as the residual standard ink would contaminate the process.
- DTF Printers: These are more specialized and represent a larger investment. A DTF printer is an inkjet system modified to handle DTF inks and the film feeding mechanism. They often include a white ink channel, which requires regular maintenance and agitation to prevent clogging. These printers work in conjunction with a powdering and curing unit, which can be a manual shaker and a small oven or a large, automated all-in-one system.
Cutters:
- Vinyl Cutters/Plotters: These devices are for HTV. They use a small, precise blade to cut the design into the sheet of vinyl. The cutter reads the vector paths from your design file and directs the blade to follow them exactly. Cutters range from small desktop models for hobbyists to large, industrial-sized plotters for commercial production. The key specifications to consider are cutting force (which determines its ability to cut through thicker materials like glitter vinyl) and cutting speed.
Weeding and Miscellaneous Tools:
- Weeding Tools: For HTV, a set of weeding tools is non-negotiable. These are small, sharp instruments, like dental picks or specialized hooks, used to remove the negative space vinyl from your design. A good weeding tool makes this often-tedious process much faster and more accurate.
- Heat Resistant Tape: This is a special tape (often yellow or blue) that can withstand the high temperatures of the heat press. It is used to secure sublimation paper or DTF transfers to the substrate, preventing them from shifting during the pressing process, which can cause a "ghosting" or double-image effect.
- Teflon Sheets or Parchment Paper: A protective sheet is always placed between the heat platen and the transfer/garment. This prevents any ink or adhesive from getting onto the platen and protects the garment from direct contact with the hot metal surface, reducing the risk of scorching.
Having all these materials and tools prepared and organized before you begin the production process is a hallmark of a professional workflow. It prevents delays and minimizes the chances of costly errors.
Step 3: The Production Process: Printing, Cutting, and Weeding
This is the phase where the digital design becomes a physical object, a ready-to-press transfer. Each method has its own unique workflow, a sequence of steps that must be followed with care and precision. This is the manufacturing stage of learning how to make heat press transfers.
Direct-to-Film (DTF) Printing: The Modern Powerhouse
The DTF process is a multi-stage workflow that creates a vibrant, durable, and versatile transfer. Let us walk through it step by step.
-
Printing on the Film: The process begins at the DTF printer. The prepared digital file (a high-resolution PNG with a transparent background is ideal) is sent to the printer via specialized RIP (Raster Image Processing) software. This software is crucial as it controls the ink flow, including the application of the white ink layer. The printer first lays down a layer of CMYK color ink directly onto the coated side of the PET film. Then, in a second pass over the same area, it prints a layer of bright white ink precisely on top of the color layer. For designs intended for dark garments, this white layer serves as an opaque base that allows the colors to pop. For designs on white garments, the white underbase can often be omitted to create a softer feel.
-
Applying the Adhesive Powder: Immediately after printing, while the ink is still wet, the film is coated with a special thermoplastic polyurethane (TPU) adhesive powder. This powder looks like a fine white sand or salt. In a manual setup, the operator generously sprinkles the powder over the entire printed area, gently rocking the film back and forth to ensure complete and even coverage. The excess powder is then shaken off, and any stray particles are carefully brushed or blown away. It is critical that the powder sticks only to the wet ink and not to the blank areas of the film.
-
Curing the Transfer: The powdered film is now moved to a heat source for curing. This is not the final press onto the garment; this step is solely to melt the powder and fuse it with the ink layer. This can be done in a small convection oven, under a heat press with the platen hovering just above the film (not touching it), or in a dedicated DTF curing tunnel. The goal is to heat the transfer to around 120-150°C (250-300°F) for two to three minutes. The visual cue for proper curing is the powder transforming from a grainy texture to a smooth, orange-peel-like, rubberized surface. This step creates the final, stable DTF transfer, a single, peelable film ready for application or storage. Once cured, these transfers are stable and can be stored for months before being pressed.
Sublimation Printing: The Art of Gaseous Dyes
The production of a sublimation transfer is deceptively simple, but it is rooted in fascinating chemistry.
-
Printing on Sublimation Paper: The mirrored design file is sent to the dedicated sublimation printer. The printer uses sublimation inks to print the design onto the coated side of the sublimation paper. When the print emerges from the printer, the colors may look dull, faded, or incorrect. This is completely normal and a common point of confusion for beginners. The true, vibrant colors of the ink are only revealed when they are activated by heat during the pressing stage. It is a moment of trust in the process.
-
Preparing for Press: Once printed, the sublimation transfer is ready to use. There is no additional powdering, curing, or weeding required. If the design does not go to the edge of the paper, it can be helpful to trim the paper close to the design. This makes it easier to position on the substrate and reduces the chance of leaving a faint press line from the edge of the paper on the garment. The transfer is now ready to be taped to a sublimation-compatible substrate. The simplicity of this two-step production process (print and press) is one of sublimation's major advantages for producing full-color graphics.
Vinyl Cutting and Weeding: Precision and Patience
Creating a heat transfer vinyl (HTV) transfer is a more mechanical and tactile process, a craft of subtraction.
-
Setting Up the Cut: The vector design file (SVG, AI, etc.) is opened in the software that controls the vinyl cutter, such as Cricut Design Space or Silhouette Studio. The sheet or roll of HTV is loaded into the cutter. It is crucial to load the material correctly: shiny side down. The shiny side is the clear carrier sheet; the duller side is the vinyl material and its adhesive backing, which is what needs to be cut. In the software, you must select the correct material setting (e.g., "Glitter Vinyl," "Everyday Iron-On"). This tells the cutter to use the appropriate blade depth and cutting force for that specific material. And, most importantly, the design must be mirrored before cutting.
-
The Cutting Process: The cutter is initiated, and it begins to work. The machine's blade moves precisely along the vector paths of the design, cutting through the vinyl layer but leaving the clear carrier sheet intact. This is known as a "kiss cut." The carrier sheet's job is to hold all the cut pieces together in their correct positions.
-
Weeding the Design: After cutting, the vinyl is removed from the machine. Now comes the process of weeding. Using a weeding tool, you begin to peel away all the vinyl that is not part of the design (the negative space). This includes the large background area and the small internal pieces, like the centers of letters like 'O' or 'A'. This can be a quick and satisfying process for simple designs or a meticulous, time-consuming task for complex ones. Good lighting and a patient hand are your best allies here. Once all the excess vinyl is removed, what remains on the clear carrier sheet is your finished, ready-to-press HTV transfer. For multi-color designs, this entire cut-and-weed process must be repeated for each color layer.
Each of these production methods yields a transfer with unique properties, born from its distinct process. The creator's role is to act as a skilled technician, guiding the materials through each step to ensure the final transfer is a perfect physical representation of the initial digital vision.
Step 4: The Main Event: The Heat Pressing Process
All the preceding steps—design, material selection, and transfer production—have been in preparation for this moment. The heat press is where the magic happens, where the design permanently joins with the substrate. This stage demands precision and a methodical approach. A few seconds of carelessness here can undo hours of careful preparation. A high-quality flat heat press machine is the cornerstone of professional results.
Calibrating Your Heat Press Machine: The Key to Consistency
Before you press your first real product, you must be confident that your machine is telling you the truth. The digital readout on your press shows the target temperature, but is the platen actually reaching that temperature uniformly?
Temperature Verification: A simple and effective way to check this is with an infrared (IR) temperature gun. Once your press indicates it has reached the set temperature, say 160°C (320°F), use the IR gun to measure the temperature at various points on the heat platen: the center, all four corners, and the mid-points. In a quality press, the readings should be very close to the set temperature, within a few degrees. If you find significant cold spots—for example, if the corners are 20 degrees cooler than the center—it will lead to inconsistent pressing. This is a common issue with cheaper, lower-quality presses.
Pressure Testing: Setting the pressure on a manual press is more of a tactile skill. The pressure is adjusted with a knob, usually on top of the press, which raises or lowers the heat platen. "Firm" pressure should require a good amount of effort to close and lock the handle. "Medium" pressure should be firm but comfortable to close. "Light" pressure should allow the press to be closed with minimal effort. A simple test is the "dollar bill test." Place four dollar bills at the four corners of the lower platen, halfway under the heat platen. Close the press. If you can easily pull any of the bills out, the pressure is uneven. Adjust until all four bills are held with similar tension.
Knowing your machine's true performance allows you to adjust your settings accordingly and is a hallmark of a professional operator.
Pre-Pressing: The Unsung Hero of a Perfect Application
This is perhaps the most skipped step by beginners, and one of the most vital. Before you place your transfer on the garment, you must pre-press the garment by itself. Place the garment on the lower platen, in the position you intend to press, and press it for 5-10 seconds. This accomplishes two critical things:
- Moisture Removal: Textiles, especially natural fibers like cotton, absorb moisture from the air. When this moisture is hit with the high heat of the press, it turns to steam. This steam can interfere with the transfer's adhesion (for HTV and DTF) or ruin the clarity of the image (for sublimation). Pre-pressing evaporates this moisture, creating a dry surface that is ready to accept the transfer.
- Wrinkle Removal: The pressure of the pre-press smooths out any wrinkles or creases in the application area. Applying a transfer over a wrinkle means the transfer is not bonding to the fabric in that spot, creating a permanent flaw in the design.
This simple, quick step dramatically increases your chances of a perfect, durable application.
Placement and Alignment: Achieving Professional Results
How do you ensure your design is perfectly centered and straight every time? Eyeballing it is a recipe for slightly crooked logos and frustrated clients.
A common professional technique is to fold the shirt in half vertically and give it a quick press to create a faint centerline. You can do the same with your transfer (for HTV or DTF, fold the carrier sheet; for sublimation paper, make a gentle fold). By aligning the centerline on the transfer with the centerline on the shirt, you can achieve perfect horizontal centering.
For vertical placement, a T-shirt guide or ruler is an invaluable tool. A standard rule of thumb for a chest logo on an adult T-shirt is to place the top of the design about three to four fingers' width down from the collar. These guides provide markings for different shirt sizes and necklines, allowing for consistent placement across an entire order. Taking a few extra moments to measure and align the design separates amateur work from professional custom apparel.
The Pressing Cycle: Executing the Transfer
With the machine calibrated, the garment pre-pressed, and the transfer perfectly positioned, it is time to press.
- Position the Substrate: Lay the pre-pressed garment flat on the lower platen of your heat press machine. Ensure there are no seams, collars, or zippers on the platen area, as these will create uneven pressure. Many presses offer interchangeable lower platens of different sizes to accommodate smaller items or avoid seams.
- Place the Transfer: Carefully position your transfer on the garment using your alignment guides. For sublimation and DTF, it is wise to use a few small pieces of heat-resistant tape to secure the transfer and prevent it from shifting when you close the press.
- Use a Protective Sheet: Always place a protective sheet over the top of the transfer. This is typically a Teflon sheet or a sheet of silicone-treated parchment paper. This protects your garment from direct contact with the metal platen and prevents any excess ink or adhesive from contaminating your heat platen.
- Engage the Press: Close the press and lock it. The machine's timer will begin to count down. The specific time and temperature will be determined by the type of transfer you are using. For example:
- Typical HTV: 150-160°C (300-320°F) for 10-15 seconds.
- Typical Sublimation (Fabric): 195-205°C (385-400°F) for 45-60 seconds.
- Typical DTF: 140-165°C (280-330°F) for 10-15 seconds. These are general guidelines; always consult the manufacturer's instructions for your specific media.
- Release the Press: When the timer beeps, open the press carefully. Now, you must proceed to the final step, which depends on the type of transfer.
Hot Peel vs. Cold Peel: Understanding the Difference
The final action is removing the carrier sheet (for HTV and DTF) or the paper (for sublimation). The instructions for your transfer media will specify whether it is a "hot peel," "warm peel," or "cold peel." This is a critical instruction.
- Hot Peel: This means you can, and should, peel the carrier away immediately after the press opens, while the garment is still very hot. The adhesive is designed to release from the carrier at high temperatures. Peeling a hot peel transfer when it is cold can result in the transfer lifting off the shirt.
- Cold Peel: This requires patience. You must remove the garment from the press and let it cool down completely to room temperature before attempting to peel the carrier. You can speed this up by waving the shirt or placing it on a cool surface. The adhesive for a cold peel transfer is designed to fully set and bond to the fabric as it cools. Peeling it while hot will likely ruin the transfer.
- Warm Peel: This is an intermediate stage, where you wait a few seconds (5-10) for the item to cool slightly but is still quite warm to the touch before peeling.
Sublimation paper is generally removed immediately while hot to prevent any lingering dye gas from re-absorbing unevenly as it cools. Always peel the carrier sheet back in a smooth, low, and even motion. Do not pull straight up. If you notice the transfer lifting during the peel, stop. It may be possible to cover it back up with the protective sheet and press it again for a few more seconds to fix the adhesion issue.
Step 5: Post-Press Care and Quality Control
The life of a heat transfer does not end when the press opens. The steps taken immediately after pressing, and the instructions given to the end-user, are what guarantee the longevity and continued quality of the decoration. This final phase is about ensuring the product is not just beautiful but also durable.
Curing and Aftercare: Ensuring Longevity and Durability
A freshly pressed garment is in a vulnerable state. The inks and adhesives need time to fully set and cure.
The 24-Hour Rule: The most important instruction you can follow and provide to a customer is to wait at least 24 to 48 hours before washing the garment. This waiting period allows the adhesives in HTV and DTF transfers to fully cross-link and bond with the fabric fibers. For sublimation, while the bond is instantaneous, allowing the garment to rest is still good practice. Washing the item too soon is the single most common cause of premature peeling or cracking.
Washing and Drying Instructions: To maximize the life of a custom-decorated garment, specific care instructions should be followed:
- Turn the garment inside out before washing. This minimizes the friction and abrasion the transfer experiences from other clothes in the wash.
- Wash in cold or cool water. Hot water can soften adhesives and cause stress on the transfer.
- Use a mild detergent. Harsh detergents, fabric softeners, and bleach can chemically degrade the transfer materials over time. Fabric softeners, in particular, can leave a coating that weakens the adhesive bond.
- Tumble dry on low heat or, ideally, hang to dry. High heat from a dryer is the enemy of a heat transfer. It can cause the transfer to soften, wrinkle, or even peel. Hanging the garment to dry is the gentlest and most effective method for preserving the decoration.
- Do not iron directly on the transfer. If the garment needs ironing, turn it inside out and iron the back side, or place a cloth over the transfer. Direct contact with an iron can melt and destroy the design.
Providing these instructions to your customer on a small card or tag with their purchase is a sign of professionalism and helps manage expectations for the product's lifespan.
Troubleshooting Common Issues: Fading, Cracking, and Peeling
Even with careful execution, problems can arise. Understanding the cause of common failures is the key to fixing them and preventing them in the future. Learning how to make heat press transfers proficiently involves learning how to diagnose these problems.
| Issue | Possible Cause(s) | Solution(s) |
|---|---|---|
| Transfer is Peeling/Lifting | 1. Insufficient pressure. 2. Insufficient temperature or time. 3. Garment was not pre-pressed (moisture). 4. Peeling hot when it should be cold (or vice-versa). 5. Pressing over a seam/zipper causing uneven pressure. | 1. Increase pressure setting. 2. Increase temperature or time slightly (in small increments). 3. Always pre-press for 5-10 seconds. 4. Double-check and follow the media's peel instructions. 5. Use a smaller platen or a pressing pillow to elevate the application area. |
| Colors Look Faded (Sublimation) | 1. Insufficient time or temperature. 2. Using a non-polyester or low-polyester blend fabric. 3. Using incorrect paper or ink settings. 4. Paper was printed on the wrong side. | 1. Increase press time or temperature. 2. Ensure you are using 100% polyester for vibrant colors. 3. Use the correct ICC profile for your ink/paper combo. 4. Verify the correct printing side of your sublimation paper. |
| Vinyl is Cracking/Wrinkling | 1. Overheating/too much time. 2. Stretching the garment before the transfer has fully cured. 3. Washing/drying with high heat. 4. Layering incompatible types of vinyl. | 1. Reduce press time or temperature. 2. Allow 24 hours before wearing or stretching. 3. Follow cold wash/low-heat dry instructions. 4. Check manufacturer guidelines for layering (e.g., do not layer on top of glitter vinyl). |
| Scorched Garment or "Box" Outline | 1. Temperature is too high for the fabric. 2. Pressure is too heavy. 3. The heat platen is larger than the transfer paper, leaving an impression. | 1. Lower the temperature. 2. Reduce the pressure setting. 3. Trim transfer paper close to the design. Use a pressing pillow to lift the print area. |
Building a Quality Control Checklist
To ensure consistency, especially in a production environment, implementing a simple quality control (QC) checklist is invaluable. Before any item is packed and shipped, it should be inspected. This checklist might include:
- Placement: Is the design straight and correctly positioned according to the order's specifications? (Measure it!)
- Adhesion: Gently run a fingernail over the edge of the transfer. Is it fully bonded to the fabric with no lifting edges?
- Appearance: Are the colors correct? Is there any cracking, peeling, or discoloration? Is the garment free from scorch marks or press box outlines?
- Weeding: For HTV, have all the small, negative-space pieces been correctly weeded?
- Overall Finish: Is the item clean and free of any lint, stray powder (from DTF), or tape residue?
By systematically checking each item against these criteria, you can catch errors before they reach the customer, saving you the cost and reputational damage of returns and reprints. This final inspection is the seal of quality on your work.
Advanced Techniques and Business Considerations
Once you have mastered the fundamental five-step process, a new world of creative and commercial possibilities opens up. Moving beyond a simple T-shirt involves exploring more complex techniques and thinking strategically about how to turn this skill into a profitable venture. This includes working with specialized equipment like a hat heat press machine or a versatile combo heat press machine.
Layering Heat Transfer Vinyl (HTV)
Creating multi-color designs with HTV requires a technique called layering. This involves pressing multiple colors of vinyl on top of one another to build a composite image. While it can produce stunning results, it requires careful planning.
The Cardinal Rule of Layering: The bottom layers should only be pressed for a very short time—just 2-3 seconds. This is called "tacking." The goal is just to get the vinyl to adhere to the shirt enough so that you can peel its carrier sheet off. You apply the full recommended time and pressure only on the final, top layer. If you press each layer for the full 15 seconds, the cumulative heat exposure will shrink the vinyl and the garment, causing registration issues, and can over-cook the adhesive on the bottom layers, leading to failure.
Material Compatibility: Not all vinyls can be a bottom layer. Specialty vinyls like glitter, flock, or holographic types generally cannot be layered on top of. Their textured or unstable surfaces do not provide a good foundation for another layer's adhesive. These should always be the top-most layer of a design. Standard polyurethane (PU) vinyls are typically the best for base layers. Always check the manufacturer's recommendations for layering.
Managing Bulk: Each layer of vinyl adds thickness. For a design with four or five colors, the final transfer can become quite thick and stiff. A clever design technique to avoid this is the "knockout" method. Instead of laying a letter 'B' on top of a red circle, you use your design software to "knock out" or subtract the shape of the 'B' from the circle. You then press the red circle with the 'B'-shaped hole in it, and then carefully place the separate 'B' into the hole, fitting it like a puzzle piece. This results in a multi-color design with the soft feel of a single layer.
Working with Specialized Substrates (Hats, Mugs, Plates)
Decorating items beyond flat garments requires specialized equipment and techniques to handle different shapes and materials.
Hats and Caps: A standard flat press cannot properly apply a transfer to the curved surface of a hat. This is the job of a hat heat press machine. These presses feature a curved upper platen and a rounded lower form (a "buck") that supports the shape of the cap. The challenge with hats is the smaller surface area and the presence of seams. You need to ensure the design fits within the printable area of the hat's front panel and that the pressure is even across the curved surface.
Mugs and Drinkware: Cylindrical items require a mug press machine. This device wraps a heating element around the mug, applying heat and pressure simultaneously to its circumference. This is almost exclusively used for sublimation, as the process perfectly infuses the design into the mug's polymer coating. Key considerations include using a mug that is specifically designed for sublimation, ensuring the artwork is wrapped tightly and taped securely, and using the correct time and temperature to achieve a full, vibrant wrap-around image without "hot spots" or faded areas.
Plates and Irregular Items: A combo heat press machine is an excellent investment for those looking to diversify. These versatile units typically come with a main flat platen for shirts, along with interchangeable attachments for mugs, plates (both small and large), and hats. This allows a single machine to serve multiple functions, saving space and money. When pressing plates, a circular heating element is used that matches the plate's shape, ensuring heat is concentrated on the printable area without overheating the rim.
Scaling Production: From Hobby to Business
Transitioning from a hobbyist to a business owner involves a shift in mindset and workflow.
Efficiency is Key: Time is money. Look for ways to streamline your process. Can you print a whole sheet of DTF transfers at once instead of one at a time? Can you set up an efficient weeding station with good lighting and tools? For larger orders, investing in an automatic or semi-automatic heat press can significantly reduce operator fatigue and increase output. These presses open automatically when the timer is done, or in the case of a swing-away, can have a dual-station setup where one shirt is being pressed while the other is being prepared.
Outsourcing vs. In-House: As your business grows, you may face a choice: invest in bigger, faster equipment (like a commercial DTF printer) or outsource the production of your transfers. Many companies specialize in printing custom DTF or sublimation transfers. You would still do the pressing in-house, but you would be freed from the maintenance and material handling of the printing process. This is a strategic decision based on your order volume, capital, and desire to control the entire process.
Cost Analysis: Pricing Your Custom Products
To run a profitable business, you must know your costs. A common mistake is to only factor in the cost of the blank garment and the transfer. A true cost analysis is more comprehensive:
- Direct Material Costs: The blank shirt, the vinyl/paper/film, the ink, the adhesive powder. Calculate this on a per-item basis.
- Labor: What is your time worth? You must account for the time spent designing, printing, weeding, and pressing. Even if you are the only employee, you should "pay" yourself an hourly wage in your calculations.
- Overhead: These are the indirect costs of running the business. This includes the electricity to run the press, the monthly subscription for your design software, rent for your workspace, marketing costs, and the depreciation of your equipment.
- Profit Margin: After you have calculated the total cost to produce one item, you add your desired profit margin. This is the money the business earns. A typical keystone pricing model is to charge double your total production cost, but this can vary widely by market and product.
By understanding your true costs, you can set prices that are both competitive and sustainable, ensuring your passion for creating can also be a viable enterprise.
Frequently Asked Questions (FAQ)
1. Can I use a regular home iron instead of a heat press machine? While it is technically possible for some types of iron-on vinyl, it is strongly discouraged for professional or durable results. A home iron cannot provide the consistent, even temperature or the heavy, uniform pressure that is required for a transfer to properly and permanently bond to a fabric. A heat press allows you to set a precise temperature and time, and its design ensures pressure is distributed evenly across the entire design, which is something an iron cannot do. This leads to transfers that peel, crack, and wash out very quickly.
2. Why do my sublimation transfers look faded and dull? There are two primary reasons for this. First, if you are looking at the printed paper before pressing, the colors will naturally appear faded; the true, vibrant colors only develop under heat. Second, if the final product is faded, it is almost always due to one of three things: the garment is not 100% polyester (the dye only bonds to polyester), the temperature was too low, or the press time was too short. Increase your temperature or time in small increments and ensure you are using a compatible substrate.
3. What is the difference between DTF (Direct-to-Film) and traditional transfer paper? Traditional transfer paper for inkjet or laser printers creates a stiff, heavy layer on top of the shirt that is prone to cracking and has a very noticeable "hand" or feel. DTF, on the other hand, uses a flexible ink and adhesive system that results in a much softer, more stretchable, and significantly more durable transfer. DTF also uses a white ink base, allowing for vibrant full-color prints on dark garments, which is very difficult to achieve with standard transfer paper.
4. My heat transfer vinyl (HTV) is peeling off after one wash. What did I do wrong? The most likely culprit is insufficient pressure or temperature during application. The adhesive did not get hot enough or was not pushed into the fabric fibers enough to create a strong bond. Another common reason is not waiting 24-48 hours before the first wash, as the adhesive needs time to fully cure. Finally, check that you are using the correct type of vinyl for your fabric and that you followed the hot/cold peel instructions properly.
5. Do I need a special printer for every type of transfer? Yes, for the most part. Sublimation requires a dedicated printer with sublimation inks. DTF requires a specialized DTF printer designed to handle the specific inks and film. The only method that does not require a printer is heat transfer vinyl (HTV), which instead requires a vinyl cutter/plotter to create the design. You cannot use a single printer with interchangeable inks for these different processes.
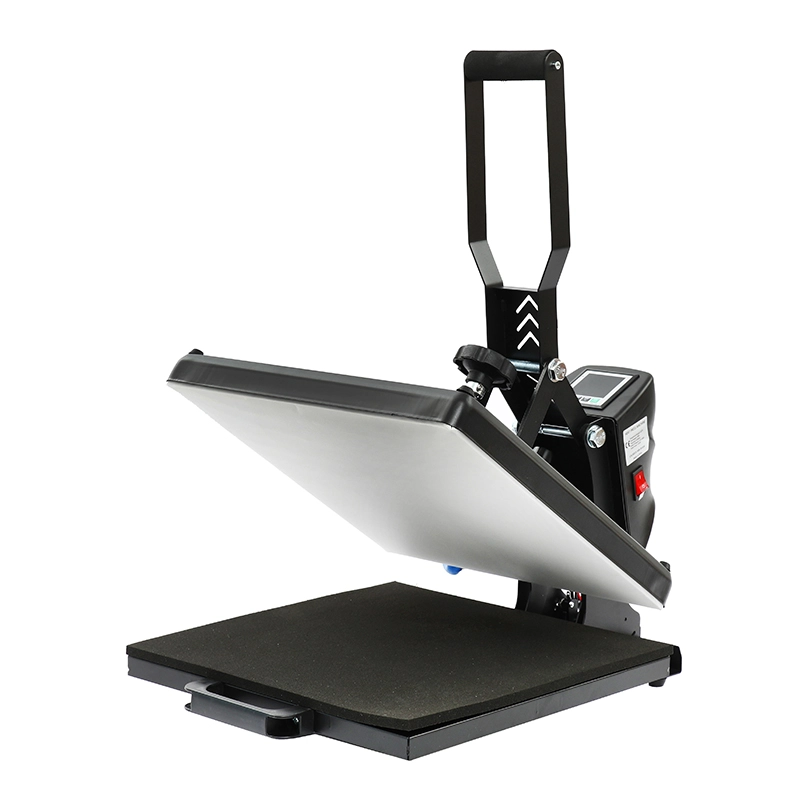
6. How do I choose the right heat press machine for my needs? Consider three factors: size, style, and features. The size of the press (e.g., 15×15 inches) should be large enough for the biggest designs you plan to make. The style is typically either "clamshell" (which opens like a mouth, saving space) or "swing-away" (where the top platen swings to the side, giving you a clear view of your workspace). For beginners, a quality clamshell is often a great start. If you plan to decorate various items, a combo heat press machine with interchangeable attachments for mugs, hats, and plates offers the most versatility.
7. What is "weeding" and why is it necessary? Weeding is the process of removing the excess heat transfer vinyl (HTV) from around your cut design. After a vinyl cutter cuts your logo or text, it only cuts the outlines. You then have to manually peel away all the vinyl that is not part of the final design, including the centers of letters like 'A', 'O', and 'P'. This is a necessary step for HTV because you only want the design itself to be transferred to the shirt.
Conclusion
The journey of learning how to make heat press transfers is one of continuous education, a blend of artistic vision and technical execution. It begins not with the heat of the press but in the quiet contemplation of a design, understanding the distinct languages of vinyl, sublimation, and DTF. Success is built upon a foundation of knowledge: a respect for the triad of time, temperature, and pressure; a commitment to selecting the right materials for the task; and a methodical approach to production, from the click of a mouse to the final peel of a carrier sheet. The process demands patience in the face of a stubborn piece of vinyl, trust in the transformative chemistry of sublimation, and precision in the multi-layered dance of DTF. By embracing both the science and the craft, by learning from failures, and by maintaining a rigorous standard of quality, anyone can move from novice to artisan, capable of creating durable, beautiful, and meaningful custom products that bring ideas to life.
References
Angerer, S. (2024, June 20). A printer's guide for heat presses. FESPA. https://www.fespa.com/en/news-media/a-printer-s-guide-for-heat-presses
Heat Press Nation. (2022, April 14). The ultimate heat press buyer's guide. https://www.heatpressnation.com/blogs/blog/heat-press
Heat Transfer Warehouse. (n.d.). Heat press buying guide: How to choose the right heat press machine. Retrieved January 1, 2025, from https://www.heattransferwarehouse.com/heat-press-buying-guide-how-to-choose-the-right-heat-press-machine/
Jestratijevic, I., & Curovic, D. (2014). The impact of physical properties of transfer paper on the quality of the sublimation printing process on polyester fabric. Journal of The Textile Institute, 106(3), 265–273.
ScreenPrinting.com. (n.d.). A guide to selecting the right heat press for your screen print shop. Retrieved January 1, 2025, from https://www.screenprinting.com/blogs/news/a-guide-to-selecting-the-right-heat-press-for-your-screen-print-shop
ScreenPrinting.com. (n.d.). The ultimate guide to heat transfer press: Techniques, tips, and troubleshooting. Retrieved January 1, 2025, from
Stahls'. (n.d.). The best heat press buying guide. Retrieved January 1, 2025, from