


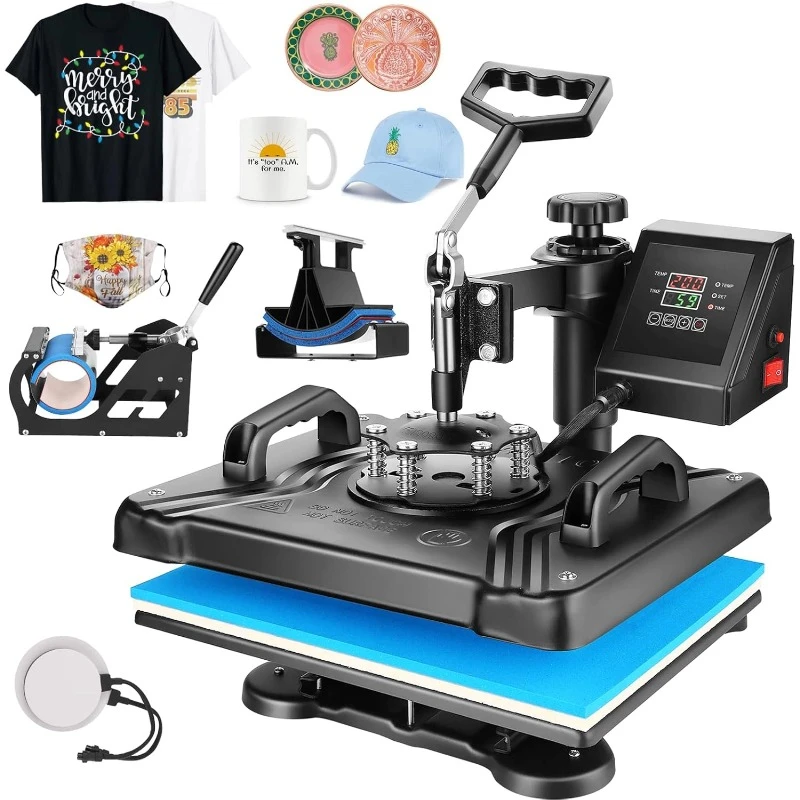
Why Do So Many Custom Garment Startups Struggle with Heat Press Quality—and How Can You Master It in Three Attempts?
février 12, 2026
The difference between a shirt that peels after three washes and one that stays vibrant for two years is rarely the brand of the transfer paper. It is the operator’s understanding of how to use a heat press for shirts as an integrated system of time, temperature, pressure, and material science. The direct answer to the title question is this: most struggles come from treating the heat press like an iron. An iron applies inconsistent pressure and localized heat; a professional heat press applies uniform energy across the entire substrate. Mastering the equipment requires shifting your mindset from “pressing” to “curing.”
The Four Variables You Must Calibrate, Not Just Set
Why time and temperature are meaningless without pressure and peel method
Every heat press has digital displays for time and temperature. These are easy to copy from a chart. The variables that separate consistent production from frequent rejects are pressure calibration and the peel method. These are rarely taught in basic product tutorials.
Pressure: The Most Neglected Calibration
A common error is assuming the pressure knob should always be turned to maximum. Excessive pressure squeezes out the adhesive or distorts the fabric weave, causing ghosting or weak bonds. Insufficient pressure leaves air gaps, resulting in patchy transfers.
Example: A sportswear startup in Manchester was producing 200 custom jerseys weekly but had a 15% rejection rate due to peeling after the first wash. Their Machine Easypress was set to the correct temperature and duration, but the pressure was so high it crushed the mesh fabric’s texture, reducing the surface area for adhesive contact. Reducing the pressure by two full turns lowered the rejection rate to under 2% immediately. They learned that pressure should be set using the “paper drag test”—if you cannot pull the carrier sheet without resistance, the pressure is sufficient.
Hot Peel Versus Cold Peel: Reading the Material
Many transfer materials specify a peel method—hot, warm, or cold. Ignoring this is the fastest way to ruin a design. Hot peel materials are designed to be removed immediately, leveraging the molten adhesive’s flow. Cold peel materials require the adhesive to solidify to achieve proper fracture.
Actionable Protocol: Create a small process sheet laminated and attached to each heat press. For every material type you stock, list the temperature, time, pressure setting (e.g., “4 on the dial”), and the exact peel instruction. Remove operator guesswork.
The Pre-Press: Why Your Shirt Must Be a Substrate, Not a Fabric
Eliminating moisture and wrinkles is not optional
A shirt fresh from a cardboard box contains ambient moisture trapped in the cellulose fibers. When heated, this moisture turns to steam. If the steam cannot escape laterally, it will rise through the transfer, creating micro-blisters that appear as white spots or cloudy areas in dark garments.
The Fifteen-Second Insurance Policy
The pre-press is a closed platen press of the bare garment for five to ten seconds. This accomplishes three critical tasks:
- It expels moisture vapor.
- It flattens seams and wrinkles that would cause pressure shadows.
- It warms the fibers, reducing the thermal shock on the transfer adhesive.
Example: A promotional products company in Ohio struggled with inconsistent results on 100% cotton polo shirts. The problem was isolated to orders shipped during winter months, when the shirts arrived cold and damp. After implementing a mandatory five-second pre-press for every garment, their defect rate dropped by 80%. The extra five seconds per unit saved them hours of rework and dozens of customer credits.
Positioning and Tack: Solving the Crooked Application Epidemic
Why the first point of contact determines the final alignment
Crooked transfers are the most visible quality failure. They occur because operators attempt to position the design while the shirt is on the lower platen and the upper platen is hovering above, creating an optical illusion.
The Hinge Method and Tack Down
Professional decorators use a hinge method with heat-resistant tape. The transfer is taped along one edge only, creating a hinge. The shirt is positioned, the transfer is flipped up, and the garment is adjusted. The transfer is then flipped down, checked for squareness with the platen edges or collar points, and taped on the opposite side.
Critical Technique: For larger format applications, such as back prints, a temporary tack can be used. A Machine de pressage à chaud à plat is closed for two seconds only—enough to lightly bond the transfer to the fabric. The operator can then lift the platen, verify alignment, and if necessary, gently peel the transfer and reposition. This technique eliminates the terror of irreversible placement.
Understanding Your Heat Press’s Thermal Behavior
Why the digital readout is a reference, not a gospel
The temperature displayed on a heat press controller is the temperature at the sensor, which is typically embedded in the upper heating element. The temperature at the surface of the Teflon-coated platen, and critically, at the interface between the transfer and the shirt, can be significantly different.
The Surface Temperature Verification
Professional shops verify their equipment using a surface thermocouple or an infrared thermometer calibrated for non-glossy surfaces. They map the platen’s thermal uniformity—many budget presses have hot spots near the heating elements and cool zones at the corners.
Example: A custom apparel shop in Melbourne upgraded to a Machine de presse à chaud à plat with dual-tube heating. During commissioning, they used temperature indicating strips across the platen and discovered a 12°C variation between the center and the front edge. By adjusting their placement protocol to keep designs within the verified 95% uniform zone, they eliminated edge-failure issues. They now record a thermal map of each machine every quarter.
| Process Step | Common Mistake | Professional Protocol | Quality Impact |
| Pre-Press | Skipping or forgetting | 5s close, full pressure | Eliminates moisture blisters, reduces ghosting |
| Pressure Setting | Cranked to maximum | Paper drag test; calibrated by material thickness | Prevents adhesive crush and fabric distortion |
| Positioning | Free-hand placement | Hinge method with tape; 2s tack for verification | <1mm alignment variance, zero crooked prints |
| Peel Method | Guessing or rushing | Labeled cheat sheet per material | Eliminates adhesive fracturing or delamination |
| Post-Cure | Immediate folding or stacking | Lay flat on cooling rack for 60s | Prevents adhesive re-melt and offset transfer |
Do you need a standardized operating procedure for your production floor?
Contact Taile’s application specialists to discuss your workflow.
The Post-Press Window: An Often Ignored Variable
Why what happens after the beep matters as much as the press cycle
The press cycle completes when the timer sounds, but the chemical bond continues to set as the substrate cools. Operators in a hurry often peel the carrier sheet and immediately fold the garment or stack it with others. This can cause offset—where excess adhesive transfers to the back of the shirt above it in the stack, or a phenomenon called “ghosting” where the image appears faintly on the opposite panel.
The Cooling Rack Discipline
Implement a simple rule: all heat-pressed garments must be placed flat on a clean, dry rack or conveyor and allowed to cool to room temperature before folding or bagging. This sixty-second investment preserves the integrity of the adhesive cross-linking and prevents shop-floor recontamination.
Maintenance: The Silent Killer of Consistency
Why a dirty Teflon sheet ruins more transfers than bad vinyl
A Teflon-coated platen or a protective Teflon sheet is a consumable item, not a permanent fixture. Adhesive residue from previous transfers builds up microscopically and transfers to subsequent garments, appearing as yellowish stains or glossy patches on dark fabrics.
The Daily and Weekly Rhythm
Establish a cleaning protocol. After every shift, wipe the Teflon surface with a soft, damp, non-abrasive cloth while the machine is warm (but unplugged). Once weekly, inspect the Teflon sheet for pinholes or scorching and replace it immediately. A $20 Teflon sheet protects a $2,000 machine and prevents dozens of $15 shirts from becoming seconds.
Frequently Asked Questions on How to Use a Heat Press for Shirts
Q: What temperature should I use for 100% cotton versus 50/50 poly-cotton blends?
A: Cotton typically requires higher temperatures (160–170°C) and longer dwell times (12–15 seconds) because natural fibers absorb heat. Polyester blends are heat-sensitive; use lower temperatures (150–160°C) and shorter dwell times (8–10 seconds) to prevent scorching or dye migration. Always consult the transfer material’s technical data sheet first.
Q: Why does my transfer look shiny or plasticky after pressing?
A: This is typically caused by over-pressing or excessive temperature. For matte finishes, some operators use a second Teflon sheet over the carrier and press again lightly. For future jobs, reduce temperature by 5°C or time by 2 seconds. For specific applications like sportswear numbering, consider a lower-tack matte finish vinyl.
Q: Can I use the same pressure setting for thin baby onesies and thick hoodie fleece?
A: No. Thicker materials require more pressure to ensure the platen contacts the transfer across the entire surface. However, fleece is compressible. If you use maximum pressure on fleece, you may crush its loft permanently. Adjust pressure based on the material’s thickness and compressibility, not just its category.
Q: How do I prevent dye migration when pressing polyester jerseys?
A: Dye migration occurs when heat causes the fabric dyes to vaporize and re-sublimate into the transfer film. Solutions include: using a low-temperature transfer material designed for polyester, pressing at 150°C or lower, and using an opaque white under-base layer in your transfer design. A quick pre-press also helps stabilize the fabric.
Q: Why do my transfers peel at the edges first?
A: Edge peeling indicates either insufficient pressure at the platen perimeter or adhesive that was not fully activated. Check if your heat press has even pressure distribution across the entire platen. If the corners are cool, you may need to adjust the platen leveling. Also, ensure your transfer extends at least 3mm beyond the design area to provide an anchor.
Why Operator Training Is Your Highest-ROI Investment
The difference between a commodity heat press and a professional decorating system is not just the machine’s duty cycle or heating uniformity. It is the manufacturer’s commitment to teaching the user how to achieve predictable results.
We provide detailed application guides for hundreds of material combinations, and our technical support team is staffed by former garment decorators who understand that a stopped production line costs you money and credibility. When you choose Taile, you are not just purchasing a machine; you are purchasing a methodology for consistent, professional-quality output that protects your brand reputation with every shirt you deliver.
Références
- Wikipedia. (2026). Heat press. San Francisco, CA: Wikimedia Foundation. https://en.wikipedia.org/wiki/Heat_press
- Specialty Graphic Imaging Association. (2024). Heat Transfer Application Guide. Fairfax, VA: SGIA. https://www.sgia.org/resources/heat-transfer-application-guide
- Conde, C. (2023). The Complete Guide to Vinyl and Heat Transfer Printing. Impressions Magazine. https://impressionsmag.com/2023/04/10/complete-guide-vinyl-heat-transfer-printing/

