.png)
.png)

Можно ли термопрессовать нейлон? Проверенное руководство из 5 шагов для безупречных результатов в 2025 году
Октябрь 24, 2025
Аннотация
Applying custom designs to nylon fabrics using a heat press presents a significant challenge due to the material's inherent sensitivity to heat. Nylon, a synthetic polymer, possesses a low melting point, which makes it susceptible to scorching, melting, or discoloration when subjected to the high temperatures typically required for standard heat transfer vinyl (HTV). This comprehensive guide examines the specific methodologies required to successfully heat press nylon without causing damage. It explores the critical importance of selecting specialized low-temperature application HTV or Direct-to-Film (DTF) transfers, which are engineered to adhere at temperatures safe for nylon. The document outlines a systematic, five-step process that emphasizes precise control over the three core variables: temperature, pressure, and time. By meticulously preparing the garment, calibrating the heat press equipment correctly, and following specific application and post-press care instructions, both hobbyists and professional decorators can achieve durable, high-quality results. This exploration provides the necessary technical knowledge to transform heat-sensitive nylon items like jackets, bags, and athletic apparel with custom graphics, turning a once-difficult task into a reliable and repeatable process.
Основные выводы
- Select heat transfer vinyl (HTV) specifically designed for low-temperature application on nylon.
- Always perform a test press on a hidden area of the garment to prevent costly mistakes.
- Use a protective cover sheet, such as Teflon or parchment paper, to shield the nylon from direct heat.
- Mastering how to heat press nylon requires lower temperatures, typically between 270-300°F (132-149°C).
- Allow the pressed design to cure for at least 24 hours before washing to ensure maximum durability.
- Ensure your heat press provides even pressure and accurate temperature for consistent results.
- Consider Direct-to-Film (DTF) transfers as a versatile and effective alternative for nylon fabrics.
Оглавление
- Understanding the Challenge: The Unique Nature of Nylon
- Step 1: Gathering the Essential Tools and Materials
- Step 2: Preparing Your Nylon Garment and Workspace
- Step 3: Mastering the Heat Press Application Process
- Step 4: Post-Press Care and Curing for Longevity
- Step 5: Expanding Your Skills: Advanced Nylon Projects
- Frequently Asked Questions
- A Final Thought on Craftsmanship
- Ссылки
Understanding the Challenge: The Unique Nature of Nylon
Before we can approach the task of applying heat and pressure to a nylon surface, we must first develop an intimate understanding of the material itself. To successfully heat press nylon is not merely a matter of following a set of instructions; it is an exercise in material science, a delicate negotiation with the chemical and physical properties of a polymer. Many have tried and failed, left with a shriveled, scorched piece of fabric where a beautiful design was meant to be. This failure often stems not from a lack of effort, but from a lack of understanding. Let us begin our journey by examining the very essence of nylon, for it is in its strengths that we also find its critical vulnerabilities.
What is Nylon? A Polymer's Tale
Nylon is not a single substance but a family of synthetic polymers known as polyamides. Its story begins in the 1930s with its invention by Wallace Carothers at DuPont, a discovery that would revolutionize the textile industry (Formlabs, 2025). Initially famed for its use in women's stockings, nylon quickly became prized for its exceptional strength, durability, and light weight. Think of a polymer as a long chain, composed of repeating molecular units called monomers. In the case of nylon, these chains are linked by strong amide bonds, giving the material its characteristic resilience and resistance to abrasion. This is why it is the material of choice for items that endure significant wear and tear, such as backpacks, athletic jerseys, umbrellas, and jackets.
However, the very structure that gives nylon its strength also dictates its behavior under heat. These long polymer chains are arranged in a semi-crystalline structure. Some regions are highly ordered and crystalline, contributing to its strength, while others are amorphous, or disordered, contributing to its flexibility. When we introduce heat, we are essentially giving these chains energy. Too much energy, and the ordered crystalline structures begin to break down, causing the material to lose its form permanently.
The Achilles' Heel: Nylon's Low Melting Point
The most significant hurdle in any attempt to heat press nylon is its relatively low melting point. Compared to natural fibers like cotton or even other synthetics like polyester, nylon is quite sensitive to heat. Most common types of nylon will begin to soften and deform at temperatures around 350°F (177°C) and can melt completely not far above that. Standard heat transfer vinyl (HTV), the kind you might use on a cotton t-shirt, often requires application temperatures of 320°F (160°C) or higher. As you can see, this leaves an incredibly narrow, and often non-existent, margin for error.
Imagine trying to toast a marshmallow over a bonfire. A little bit of heat, held at the right distance, gives you a perfectly golden-brown, gooey treat. A few seconds too long, or a few inches too close, and you are left with a charred, inedible mess. Heat pressing nylon is a similar endeavor. The goal is to apply just enough heat to activate the adhesive on your transfer material but not so much that you damage the delicate polymer structure of the fabric itself. It is a process that demands precision and control above all else. Scorching, which appears as a shiny or discolored area, is the first sign that you have crossed this critical temperature threshold.
Why Standard Heat Transfer Methods Fail on Nylon
The failure of standard methods is a direct consequence of this low melting point. Let's consider the typical process for a cotton shirt. You might set your heat press to 320°F for 15 seconds. At this temperature, the cotton fibers are perfectly stable, and the standard HTV adhesive melts and bonds securely to the fabric. If you were to use these same settings to heat press nylon, the outcome would be disastrous.
Within seconds, the nylon fabric under the heat platen would begin to deform. The heat would exceed its tolerance, causing the fibers to pucker and potentially melt, leaving a permanent, glossy imprint of the heat press platen on the item. The design itself may adhere, but the garment would be ruined. Furthermore, many nylon items, particularly jackets and bags, are treated with a Durable Water Repellent (DWR) coating. This chemical finish is designed to make water bead up and roll off the surface. Unfortunately, it also acts as a barrier that prevents standard HTV adhesives from properly bonding to the nylon fibers, leading to transfers that peel off after the first wash, if they even stick at all.
The Risk of Dye Migration and Scorching
Beyond the immediate risk of melting, another phenomenon known as dye migration poses a significant threat, particularly with colored nylon fabrics. Dye migration occurs when the heat from the press causes the dye within the nylon fibers to turn into a gas. This gas then permeates the layer of heat transfer material, staining your design from below. A crisp white logo applied to a red nylon jacket might look perfect right after pressing, but a day or two later, it can develop a pinkish hue as the sublimated red dye settles into the vinyl. This is an irreversible process that ruins the aesthetic of the final product.
Scorching, as mentioned earlier, is the visible damage caused by excessive heat. It manifests as a shiny or slightly melted patch on the fabric. On some colors, it can also appear as a darkening or discoloration. This damage is permanent. While dye migration ruins the design, scorching ruins the garment itself. Both are direct results of applying too much heat for too long, a common mistake when approaching nylon with the same mindset used for cotton or polyester.
Differentiating Nylon Types: Not All Nylons Are Created Equal
To add another layer of complexity, it is crucial to recognize that "nylon" is a broad term. Different types of polyamides exist, such as Nylon 6 and Nylon 6,6, which have slightly different molecular structures and, consequently, different properties, including their melting points (Xometry, 2024). Furthermore, the way the fabric is woven or knit, its thickness, and whether it has been coated will dramatically affect how it responds to heat. A thin, ripstop nylon windbreaker will be far more sensitive to heat than a thick, heavy-duty Cordura nylon backpack.
Some nylon fabrics are blended with other materials like spandex or elastane to add stretch. These blends introduce yet another variable that must be accounted for. Therefore, before beginning any project, it is imperative to identify the specific type of nylon you are working with. If possible, check the garment's tag. If no information is available, a "burn test" on a small, hidden scrap can be informative for experienced users, but the safest approach is always to assume maximum sensitivity and start with the lowest possible temperature settings. This deep appreciation for the material's nuances is the first and most critical step toward success.
Step 1: Gathering the Essential Tools and Materials
Having established a healthy respect for the delicate nature of nylon, we can now turn our attention to assembling the specific arsenal of tools and materials required for a successful application. Attempting to heat press nylon with standard supplies is akin to trying to perform surgery with kitchen utensils; the tools are simply not suited for the delicacy of the task. Success hinges on choosing materials engineered specifically for low-temperature applications and using equipment that offers surgical precision. This step is about making informed choices before the heat press is ever turned on, setting the foundation for a flawless result.
Choosing the Right Heat Transfer Vinyl (HTV) for Nylon
The single most important material choice you will make is the type of heat transfer vinyl. Standard HTV, as we have discussed, requires temperatures that are unsafe for nylon. You must seek out HTV that is explicitly marketed for use on nylon or heat-sensitive fabrics. These specialized vinyls feature a unique, aggressive adhesive that activates at a much lower temperature.
Manufacturers like Siser and Stahls' produce specific product lines for this purpose. For example, Siser's EasyWeed Extra or Stahls' CAD-CUT Gorilla Grip II are designed to adhere to challenging substrates like nylon at temperatures as low as 280°F (138°C). This lower application temperature is the key that unlocks the ability to heat press nylon safely. These adhesives are formulated to bond tenaciously not only to the nylon fibers themselves but also through common DWR coatings that would repel other types of vinyl. When purchasing HTV, carefully read the product specifications and technical data sheets. Look for the recommended application temperature, pressure, and compatible fabrics. If nylon is not listed, do not attempt to use it for your project.
| Характеристика | HTV for Nylon (e.g., Siser EasyWeed Extra) | Standard HTV (e.g., Siser EasyWeed) |
|---|---|---|
| Application Temperature | 280°F – 300°F (138°C – 149°C) | 305°F – 320°F (152°C – 160°C) |
| Adhesive Type | Aggressive, low-temperature activation | Standard, medium-temperature activation |
| Fabric Compatibility | Nylon, Leather, Lightly Coated Fabrics, Cotton, Polyester | Cotton, Polyester, Cotton/Poly Blends |
| Pressure Requirement | Medium to Firm | Средний |
| DWR Coating Adhesion | Good to Excellent | Poor to None |
The Rise of Direct-to-Film (DTF) Transfers for Nylon
In recent years, another powerful technology has emerged as an excellent solution for decorating nylon: Direct-to-Film (DTF). DTF printing is a process where a design is printed onto a special PET film using water-based pigment inks. While the ink is still wet, a powdered thermoplastic adhesive is applied to the back of the design. The film is then cured in an oven, which melts the powder into a smooth adhesive layer.
The resulting transfer can then be applied to a garment using a heat press. The major advantage of DTF for nylon is that the application temperatures are often in the same low-temperature range required for nylon-specific HTV, typically around 275°F – 300°F (135°C – 149°C). DTF offers several benefits over HTV: it can produce full-color, highly detailed photographic prints without the need for layering vinyl, and the resulting transfer is often softer and more flexible. For businesses looking to produce complex, multi-color logos on nylon jackets or bags, DTF represents a highly efficient and professional option. It is a versatile technique that works well across a range of fabrics, making it a valuable addition to any decorator's toolkit.
Selecting Your Heat Press: Precision is Paramount
Your heat press is the heart of the operation. While a basic clamshell press might suffice for simple t-shirts, the demands of working with nylon necessitate a machine that offers precision and reliability. The two most critical features are accurate temperature control and even pressure distribution.
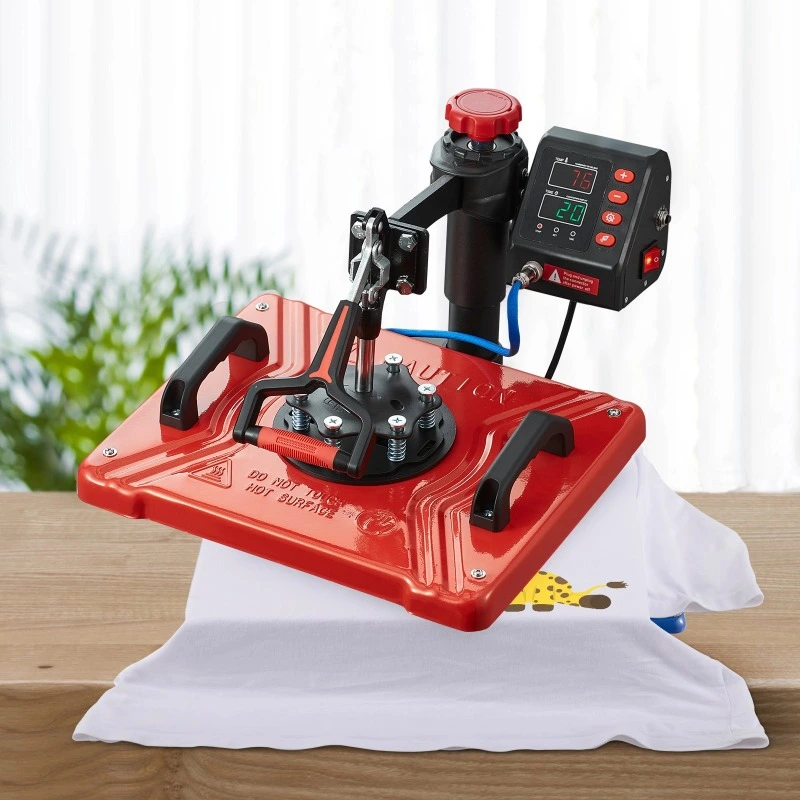
An inaccurate temperature gauge is the fastest way to ruin a nylon garment. If your press is set to 280°F but is actually heating to 320°F, you will scorch the fabric every time. A high-quality press with a reliable digital thermostat is a non-negotiable investment. Similarly, the pressure across the heat platen must be perfectly even. Uneven pressure can lead to parts of the design adhering properly while other parts peel away. Swing-away presses are often preferred for their even pressure distribution and for providing a clearer view when aligning the garment and transfer, but modern, high-quality clamshell presses can also perform excellently. For those looking to decorate a variety of items, a комбинированная термопрессовая машина offers unparalleled versatility, providing attachments for mugs, hats, and plates in addition to the standard flat platen, allowing you to expand your creative possibilities.
Essential Accessories: Protective Sheets and Pillows
Beyond the press and the transfer material, a few simple accessories are indispensable for protecting the nylon.
- Protective Cover Sheet: This is arguably the most crucial accessory. A sheet of Teflon or even simple parchment paper should always be placed between the heat platen and the nylon garment. This sheet serves two purposes. First, it diffuses the heat slightly, providing a more gentle application. Second, and more importantly, it creates a protective barrier that prevents the nylon from coming into direct contact with the hot metal platen, which is the primary cause of scorching and shiny marks.
- Heat Press Pillows: These are foam-filled pillows covered in a non-stick material. They are incredibly useful when pressing items with zippers, seams, buttons, or collars. When you press a jacket with a zipper, for example, the raised zipper creates an area of high pressure while the fabric next to it receives almost no pressure, preventing the transfer from adhering. By placing a heat press pillow inside the garment, the pillow conforms to the shape of the zipper or seam, allowing the platen to apply even pressure across the entire design area. This ensures a solid bond even on irregular surfaces.
By carefully selecting these specialized materials and precision tools, you are no longer fighting against the nature of nylon but working in harmony with it.
Step 2: Preparing Your Nylon Garment and Workspace
With our specialized materials gathered and our understanding of nylon solidified, we move to the preparatory phase. This stage is analogous to a chef's mise en place—the disciplined process of organizing and arranging all ingredients before cooking begins. It is a step often rushed or overlooked by beginners, yet it is foundational to achieving a professional, repeatable outcome. Proper preparation of the garment and calibration of your equipment mitigates risk and eliminates variables, ensuring that when the moment of application arrives, your focus can be entirely on the execution.
The Pre-Press: Why Skipping This Step is a Mistake
The pre-press is a simple but vital action. It involves placing the nylon garment on the heat press, covering it with your protective sheet, and pressing it for 3-5 seconds at the target low temperature. This seemingly minor step accomplishes two critical objectives.
First, it removes any residual moisture trapped within the fabric fibers. Nylon, like many textiles, can absorb a surprising amount of ambient moisture from the air. If this moisture is not removed, it can turn into steam during the main press, interfering with the adhesive's ability to bond and potentially causing bubbles or an uneven finish. Second, the pre-press smooths out any wrinkles or creases in the application area. Attempting to apply a transfer over a wrinkle will result in a permanent flaw in both the garment and the design. The brief application of heat and pressure creates a perfectly flat and dry canvas for your transfer, which is the ideal condition for a strong, lasting bond.
Cleaning and Inspecting the Nylon Surface
Before you even place the garment on the press, take a moment to inspect it carefully. Look for any stains, loose threads, or manufacturing defects in the area where you plan to apply the design. Once the heat is applied, some stains can become permanently set, so it is best to address them beforehand.
If the surface appears dusty or has any lint, use a lint roller to clean it thoroughly. For more stubborn spots or oils that might have come from handling, wiping the area gently with a cloth lightly dampened with isopropyl alcohol can be effective. Be sure to test the alcohol on a hidden spot first (like the inside of a pocket) to ensure it does not affect the fabric's color or finish. Allow the area to dry completely before proceeding to the pre-press. This meticulous attention to the cleanliness of the surface ensures that nothing stands between the transfer's adhesive and the nylon fibers.
Aligning Your Design: Techniques for Perfect Placement
Proper alignment separates the amateur from the professional. A crooked or off-center design can ruin the look of an otherwise perfectly pressed garment. There are several tools and techniques to ensure your placement is precise.
A simple t-shirt ruler or alignment guide can be a fantastic aid. These guides are often marked with common placement lines for chest logos, full-front designs, and more. Laying the guide on your pre-pressed garment provides a clear grid for positioning your HTV or DTF transfer. For garments without clear center lines, like bags or asymmetrical jackets, you may need to use a measuring tape. Fold the garment in half to find its vertical center and mark it lightly with a piece of heat-resistant tape. Measure down from the collar or top edge to establish the vertical placement. Once your transfer is in position, step back and look at it from a distance to confirm it appears visually correct before you commit to pressing. The carrier sheet on most HTV and DTF transfers is slightly tacky, which helps hold the design in place, but be careful not to stretch the garment when placing it on the press, as this can throw off your careful alignment.
Setting Up Your Heat Transfer Machine: Calibrating for Success
Your теплопередающая машина is your primary tool, and its proper setup is paramount. Do not trust the temperature displayed on the screen implicitly, especially with a new or unfamiliar machine. It is wise to verify the platen's temperature with an infrared (IR) temperature gun. Check the temperature at the center and near the four corners of the platen to ensure it is heating evenly. A significant temperature difference across the platen can lead to inconsistent application.
Next, set your pressure. The correct pressure for nylon is typically described as "medium" or "firm," but this can be subjective. A good way to calibrate this is the "dollar bill test." Place a piece of paper or a dollar bill at each of the four corners of the platen, halfway in and halfway out. Close the press. If you can easily pull any of the bills out, the pressure is too low or uneven. Adjust the pressure knob until you feel a consistent, firm resistance when trying to pull out each of the four bills. This ensures the pressure is distributed evenly across the entire surface, which is essential for a successful bond on the heat-sensitive nylon. Once your temperature is verified and your pressure is set, you are ready for the main event.
Step 3: Mastering the Heat Press Application Process
We have now arrived at the most critical moment in our journey: the application of heat. All our preparation and understanding of the material have led to this point. This step is a delicate dance between three variables: temperature, time, and pressure. Mastering this "golden triangle" is the key to transforming a plain nylon item into a customized piece of art without causing any harm. Let us walk through this process with the care and precision of a scientist in a laboratory, ensuring every action is deliberate and controlled.
The Golden Triangle: Temperature, Time, and Pressure Settings for Nylon
The success of your press is entirely dependent on finding the correct balance of these three elements. For nylon, the mantra is always "low and slow."
- Температура: This is the most critical variable. As established, nylon has a low melting point. You must use the lowest possible temperature that will still activate your specialized HTV or DTF adhesive. This temperature is determined by the manufacturer of your transfer material. Always consult their technical data sheet. Generally, the range for nylon is between 270°F and 300°F (132°C – 149°C). Always start at the lowest recommended temperature for your initial test press. It is far better to have a failed adhesion that can be corrected with a second short press than to have a scorched garment that is permanently ruined.
- Время: The duration of the press must also be carefully controlled. Because we are using a lower temperature, it might seem intuitive to press for a longer time, but this can be counterproductive. Prolonged exposure to heat, even at a lower temperature, can still damage nylon. The typical press time for nylon is between 5 and 15 seconds. For a very thin nylon windbreaker, you might start with just 5-7 seconds. For a thicker nylon bag, 10-12 seconds might be more appropriate.
- Давление: The pressure should be set to medium or firm. The goal is to ensure the adhesive makes complete and intimate contact with the fabric's surface. Too little pressure, and the bond will be weak. Too much pressure, especially when combined with heat, can leave an undesirable texture imprint on the fabric. Your earlier calibration using the paper test should have set you up for success here.
| Nylon Item | Тип передачи | Диапазон температур | Диапазон времени | Давление |
|---|---|---|---|---|
| Thin Windbreaker | Low-Temp HTV | 270°F – 285°F (132°C – 141°C) | 5 – 8 seconds | Средний |
| Athletic Jersey (Nylon/Spandex) | Stretch HTV for Nylon | 280°F – 295°F (138°C – 146°C) | 8 – 12 seconds | Средний |
| Heavy-Duty Backpack | DTF Transfer | 285°F – 300°F (141°C – 149°C) | 10 – 15 seconds | Фирма |
| Coated Nylon Rain Jacket | Aggressive Adhesive HTV | 280°F – 295°F (138°C – 146°C) | 10 – 15 seconds (2-step press) | Фирма |
The First Press: A Step-by-Step Walkthrough
Let's walk through the actual press, assuming all preparation is complete.
- Placement: Carefully place the pre-pressed nylon garment on the lower platen of your heat press. Ensure it is flat and smooth. If you are using a heat press pillow, ensure it is properly positioned inside the garment.
- Position the Transfer: Place your weeded HTV or DTF transfer onto the garment in the desired location. Use your alignment guides if necessary. The tacky carrier sheet should hold it in place.
- Cover the Garment: Place your Teflon sheet or piece of parchment paper over the entire application area. Ensure the protective sheet is larger than your heat platen to fully protect any exposed nylon.
- Engage the Press: Close the heat press and lock it into place. The timer should begin automatically. Stay near the press; do not walk away. These short press times leave no room for distraction.
- Release and Remove: As soon as the timer beeps, open the press immediately. Carefully remove the protective cover sheet and then gently move the garment from the hot lower platen to a cool, flat surface. This prevents the residual heat from the platen from continuing to affect the nylon.
The Peel: Hot, Warm, or Cold?
The next step, peeling the carrier sheet, is just as critical as the press itself. Transfer materials are designed for a specific peel temperature: hot, warm, or cold. This information is provided by the manufacturer and must be followed precisely.
- Hot Peel: This means you peel the carrier sheet away immediately after the press is opened, while the garment is still very hot.
- Warm Peel: This requires you to wait a few seconds (typically 5-10) after the press before peeling.
- Cold Peel: This means you must wait until the garment and transfer are completely cool to the touch before attempting to remove the carrier sheet. This can take 30 seconds to a minute or more.
Attempting to peel a cold-peel transfer while it is still hot will likely result in the design lifting off the garment. Conversely, waiting too long to peel a hot-peel transfer can sometimes make it difficult to remove the carrier sheet. When peeling, pull the carrier sheet back at a low, sharp angle, almost parallel to the garment. This smooth, low-angle peel minimizes the stress on the freshly applied adhesive. If you notice any part of the design lifting as you peel, stop immediately. Lay the carrier sheet back down, cover it with your protective sheet, and press again for 2-3 seconds. This usually resolves the issue.
Troubleshooting Common Issues: Scorching, Peeling, and Wrinkling
Even with careful preparation, issues can arise. Here is how to diagnose and address them.
- Scorching or Shiny Marks: This is almost always due to excessive heat. Your temperature is too high. Reduce it by 10°F (5°C) and try again on a test piece. Using a protective cover sheet is the best prevention.
- Design Peeling or Not Sticking: This has several potential causes. The most common is insufficient pressure or temperature. It can also be caused by a DWR coating on the garment repelling the adhesive. First, try increasing the pressure and pressing again for a few seconds. If that fails, increase the temperature slightly (staying within the safe range for nylon). If it still fails, you may need a more aggressive adhesive HTV designed for coated fabrics, or the garment's coating may be too robust for heat application.
- Wrinkling of the Vinyl: This can happen if the garment was stretched when it was placed on the press. As it cools and contracts, the vinyl wrinkles. It can also be a sign of too much heat, which can cause some vinyls to shrink slightly. Ensure the garment is laid flat but relaxed on the platen, and double-check your temperature settings.
By approaching the application process with this level of methodical detail, you transform a risky gamble into a controlled and predictable manufacturing process.
Step 4: Post-Press Care and Curing for Longevity
The journey does not end when you peel back the carrier sheet to reveal a beautiful design. The moments and days following the heat press application are a critical period of chemical and physical change. The adhesive that you have just activated needs time to fully cure and create a permanent, molecular bond with the nylon fibers. Proper post-press care is what ensures your hard work translates into a durable, washable, and long-lasting product. Neglecting this final stage can lead to a design that looks perfect initially but fails prematurely after a few wears or washes.
The Curing Period: Allowing the Adhesive to Bond
Think of the adhesive on your heat transfer material like a specialized epoxy or glue. Immediately after pressing, the adhesive is activated and has grabbed onto the fabric, but it has not yet achieved its maximum bond strength. The full curing process is a chemical reaction that continues for a period after the heat has been removed.
For this reason, it is an industry-standard best practice to wait at least 24 to 48 hours before washing or stretching the garment. This waiting period allows the adhesive polymers to fully cross-link and solidify, creating a tough, resilient bond that can withstand the rigors of washing and wearing. Washing the garment too soon, while the adhesive is still in its "green" or uncured state, can introduce water and detergents that interfere with this bonding process, leading to peeling or cracking down the line. Advise your clients or remind yourself to simply let the finished item sit undisturbed in a cool, dry place for a day or two. This simple act of patience is one of the most effective ways to guarantee the longevity of your work.
Washing and Drying Instructions for Heat-Pressed Nylon
Once the curing period is complete, the garment can be washed. However, to maximize its lifespan, it should be washed with care. The instructions you provide to a customer (or follow yourself) are crucial.
- Turn the Garment Inside Out: This is the most important step. Turning the garment inside out before washing minimizes the abrasive friction the design will face from other clothes, zippers, and the washing machine drum itself.
- Use Cold Water and a Mild Detergent: Hot water can potentially soften the adhesive over time, while harsh detergents and bleach can attack both the transfer material and the fabric dyes. Washing in cold water with a mild detergent is the gentlest and most effective method.
- Avoid Fabric Softeners: Liquid fabric softeners and dryer sheets often contain chemicals and waxes that can deposit a film on the transfer. This film can break down the adhesive over time and lead to peeling.
- Tumble Dry on Low or Hang to Dry: High heat is the enemy of both the nylon fabric and the heat transfer. The best and safest method is to hang the garment to dry. If you must use a machine, tumble dry on the lowest possible heat setting or use an air-fluff cycle with no heat. Never dry clean a heat-pressed garment, as the solvents used in dry cleaning can dissolve the adhesive.
By following these care instructions, a properly applied design on a nylon garment can last for dozens of washes, often for the entire lifespan of the garment itself.
Long-Term Durability: What to Expect
When you use the correct low-temperature HTV or DTF transfer and follow the proper application and care procedures, the durability of the design on nylon can be excellent. It should not crack, peel, or fade any more than a design on a standard cotton t-shirt would. The bond should be strong enough to withstand stretching (especially if you used a stretch-compatible vinyl on a jersey) and normal wear and tear.
The ultimate durability will be a factor of the quality of the materials used, the precision of the application process, and the diligence of the post-care. A design applied with a high-quality теплопередающая машина that provided accurate heat and even pressure will always outlast one applied with a hobby-grade iron or a cheap, unreliable press. The investment in quality materials and equipment pays dividends in the longevity and professional appearance of the final product.
Repairing a Failed Transfer: Is It Possible?
What happens if a corner starts to lift after a few washes? Is the garment a lost cause? Not necessarily. In some cases, a minor failure can be repaired. If a small part of the design is peeling, you can often fix it by re-pressing it.
To do this, place the garment back on your heat press, ensuring the peeling section is flat. It is crucial to use your protective cover sheet. You do not want the exposed vinyl to melt directly onto your heat platen. Press the garment again using the same low-temperature and short-duration settings you used initially (e.g., 280°F for 5-7 seconds). This brief re-application of heat can often be enough to reactivate the adhesive and re-bond the peeling section to the nylon.
However, if the majority of the transfer is failing, or if it has cracked significantly, a repair is unlikely to be successful. Attempting to remove a fully bonded transfer is extremely difficult and almost always results in a sticky residue or damage to the delicate nylon fabric. In such cases, prevention through proper technique is far better than attempting a cure.
Step 5: Expanding Your Skills: Advanced Nylon Projects
Once you have mastered the fundamental principles of how to heat press nylon on a simple, flat surface, a new world of creative possibilities opens up. The skills you have developed—precision temperature control, pressure management, and material selection—can be adapted to tackle more complex and challenging items. Moving beyond flat fabrics to three-dimensional objects like bags, hats, and structured jackets requires additional techniques and sometimes specialized equipment. This is where your craftsmanship truly begins to shine, transforming you from a technician into an artisan capable of customizing a wide array of popular and high-value nylon products.
Working with Challenging Items: Bags, Hats, and Jackets
Decorating items with zippers, thick seams, multiple layers, and curved surfaces presents unique challenges that a flat t-shirt does not.
- Jackets: Nylon bomber jackets and windbreakers often have zippers, pockets, and elastic cuffs. The key to success is isolating the print area. This is where heat press pillows become indispensable. By inserting a pillow of the appropriate size inside the jacket, you can raise the print area so that the seams and zippers fall off the sides, allowing your heat press to apply direct, even pressure only where it is needed. For pressing on a sleeve, using a smaller, interchangeable platen on your heat press can make the job much easier.
- Bags: Backpacks and duffel bags are often made of thick, coated nylon and are riddled with straps, pockets, and seams. Again, the strategy is to isolate the application surface. You may need to use a combination of pillows and pads to create a flat, even surface inside the bag. Because these items are often heavily coated, using an aggressive, low-temp adhesive is a must, and a firm pressure setting is required to ensure the bond is strong.
- Hats: The curved surface of a hat makes it impossible to press with a standard flat platen. This is where a dedicated машина для прессования шляп or a combo press with a cap attachment becomes essential. These presses feature a curved upper platen and a rounded lower form (the "buck") that matches the contour of a hat. This allows for even heat and pressure to be applied across the hat's front panels, ensuring a perfect application on this popular and profitable item.
Layering HTV on Nylon: A Test of Skill
Layering multiple colors of HTV is a common technique for creating dynamic designs, but it adds complexity when working with nylon. Every time you press the garment, you are exposing the nylon and the underlying vinyl layers to another cycle of heat. This increases the risk of scorching the fabric or melting the previously applied layers.
The rule for layering on nylon is to use very short presses for each layer. For the bottom layers, you only need to press for 2-3 seconds—just long enough to tack the vinyl down so you can peel its carrier sheet. This is called the "tack-down" method. You apply the first layer, press for 2-3 seconds, peel the carrier, apply the second layer, press for 2-3 seconds, and so on. Only the final, top layer receives the full recommended press time (e.g., 10-12 seconds). This technique minimizes the total heat exposure for the nylon garment and prevents the lower layers of vinyl from shrinking or leaving an adhesive residue outline. Always ensure that the HTV you are using is suitable for layering; some specialty vinyls like glitter or foil are designed to be top layers only.
Combining Heat Pressing with Other Techniques
For truly unique and high-end products, consider combining heat pressing with other decoration methods. A common and effective combination is embroidery and HTV. You could, for example, have a company name embroidered on a nylon jacket and then use heat-pressed vinyl to add a detailed logo or individual names below it.
When combining these methods, the order of operations is critical. You should always do the embroidery first. The high-speed, repetitive needle action of an embroidery machine could damage a pre-existing vinyl application. Once the embroidery is complete, you can then align and apply your heat transfer vinyl as usual. Be mindful of the thick embroidered area when pressing. You may need to use a heat press pillow or a flexible finishing sheet to ensure the heat press platen does not crush the embroidery threads, while still providing enough pressure for the HTV to adhere properly. This multi-media approach can create products with a rich texture and a premium feel.
From Hobby to Business: Selling Custom Nylon Products
Mastering the art of decorating nylon can be a significant advantage for a customization business. Products like personalized team jackets, branded corporate windbreakers, custom gym bags, and promotional hats are all high-demand items. The ability to reliably and professionally decorate these products sets you apart from competitors who may only be comfortable working with cotton and polyester.
Investing in a versatile and reliable комбинированная термопрессовая машина is a strategic move for any growing business. It allows you to offer a diverse range of products—from shirts and jackets to hats and mugs—all from a single piece of equipment. This flexibility enables you to say "yes" to more types of customer requests and maximize your return on investment. As you build a portfolio of successfully completed nylon projects, you build a reputation for quality and expertise, attracting more clients and allowing you to command higher prices for your specialized skills.
Frequently Asked Questions
Can I use a regular household iron to heat press nylon? While it might be tempting for a small, one-off project, using a household iron is strongly discouraged. The primary reasons are a lack of accurate temperature control and uneven pressure. An iron's temperature settings are imprecise, and it is very easy to exceed nylon's melting point, causing permanent damage. Furthermore, you cannot apply the consistent, even pressure required for the HTV adhesive to properly bond, which will likely result in the design peeling after washing. A dedicated heat press is the only reliable tool for this task.
What happens if I use too much heat on nylon? Using excessive heat on nylon will have immediate and irreversible consequences. The fabric will scorch, creating a shiny, often discolored patch that is permanent. In more extreme cases, the nylon fibers will melt completely, potentially creating a hole in the garment. The texture of the fabric will be permanently altered, leaving it stiff and brittle. This is why adhering to low-temperature settings is paramount.
Why is my vinyl not sticking to the nylon? There are a few common culprits. First, you may be using standard HTV instead of a specialized low-temperature vinyl with an aggressive adhesive designed for nylon. Second, the garment may have a heavy DWR (Durable Water Repellent) coating that is preventing the adhesive from bonding. Third, your heat press settings may be incorrect—either the temperature is too low, the pressure is insufficient, or the press time is too short. Always start by verifying you have the right material and then adjust your application settings.
Can I heat press on a waterproof nylon jacket? Yes, but with caution and the right materials. Most "waterproof" jackets rely on a DWR coating or a membrane. You must use an HTV specifically formulated to adhere to coated fabrics, such as Siser EasyWeed Extra or Stahls' CAD-CUT Gorilla Grip II. It is absolutely essential to perform a test press on a hidden area, like the inside of a pocket, to ensure the adhesive will bond and that the heat will not damage the waterproof membrane.
How do I know if my garment is 100% nylon? The most reliable way is to check the care tag inside the garment. The manufacturer is required to list the fabric composition. The tag will typically say "100% Nylon" or "100% Polyamide." If the tag is missing, you can sometimes identify nylon by its smooth, slick feel, light weight, and a slight sheen. However, since many synthetics feel similar, relying on the tag is always the best practice.
What is the best HTV for stretchy nylon like swimwear? For stretchy nylon blends, such as those used in swimwear or athletic compression gear, you need a vinyl that can stretch and rebound with the fabric. Look for a product that is not only rated for nylon but also has high stretchability. An example would be Siser EasyWeed Stretch, but you must check its technical data sheet to confirm its low-temperature application is compatible with your nylon blend. Using a standard, non-stretch vinyl on a stretchy garment will cause the design to crack and peel as soon as the fabric is stretched.
A Final Thought on Craftsmanship
Successfully applying a design to nylon is more than a technical process; it is a form of modern craftsmanship. It requires a dialogue with the material, an understanding of its limits, and the patience to work within them. The satisfaction comes not just from the finished product, but from mastering a challenging skill that many shy away from. Each perfectly pressed jacket or bag is a testament to your precision, your knowledge, and your dedication to quality. As you continue to practice and experiment, you will develop an intuition for the subtle adjustments needed for different fabrics and designs. Embrace this learning process, for it is in the pursuit of mastering such challenges that a simple hobby evolves into a true art form, and a business builds a reputation for excellence.
Ссылки
American Stitch Editorial Team. (2024, July 3). Best guide to screen printing on nylon. American Stitch LV. Retrieved from https://americanstitchlv.com/printing-on-nylon/
BELLA+CANVAS. (2023, October 3). How to heat transfer on nylon – Beyond the blank. Retrieved from https://blog.bellacanvas.com/heat-transfer-nylon/
de Naoum, K., & Schadegg, J. (2024, September 14). 7 properties of nylon: Everything you need to know. Xometry. Retrieved from https://www.xometry.com/resources/materials/properties-of-nylon/
Formlabs. (2025, August 4). Nylon 3D printing guide: Compare processes, materials, and applications. Formlabs. Retrieved from
Stahls'. (2020, September 12). Heat pressing on nylon fabrics. Retrieved from https://www.stahls.com/play-video?id=LS8k6UFq6tk
Stahls'. (2025, January 1). Heat printing material/fabric selection chart. Retrieved from https://www.stahls.com/heat-transfer-material-fabric-chart
Teckwrap Craft. (2024, December 4). Can you heat press on nylon? Printing hacks bet you didn’t know!. Retrieved from https://teckwrapcraft.com/blogs/tips/can-you-heat-press-on-nylon