.png)
.png)

Expert Guide 2025: How to Use a Heat Press Machine in 7 Simple Steps
Октябрь 15, 2025
Аннотация
This document offers a comprehensive exploration into the operational principles and practical application of heat press machines. It examines the intricate relationship between temperature, time, and pressure, which forms the foundational triad for successful heat transfer applications. The analysis moves beyond a superficial overview, delving into the specific requirements for various substrates, including textiles, ceramics, and metals, and different transfer media such as Heat Transfer Vinyl (HTV), sublimation, and Direct-to-Film (DTF) prints. The discourse addresses the mechanical nuances of different machine types, such as clamshell and swing-away models, alongside specialized apparatus like mug and hat presses. A central argument is that mastery of the heat press process hinges not merely on following procedural steps, but on a cultivated understanding of the material science involved. By systematically deconstructing the process from preparation to post-press care, this guide aims to equip both novices and professionals with the requisite knowledge for achieving consistent, high-quality, and durable customized products, thereby fostering a deeper appreciation for the craft.
Основные выводы
- Master the core settings of temperature, time, and pressure for flawless transfers.
- Always pre-press your substrate to remove moisture and ensure a smooth surface.
- Understand the difference between hot, warm, and cold peel for your specific transfer type.
- Properly caring for your machine ensures its longevity and consistent performance.
- Test small samples to perfect your technique before committing to a full project.
- Learn how to use a heat press machine correctly to prevent common application errors.
- Regularly clean the platens to avoid residue buildup and ensure clean transfers.
Оглавление
- Understanding the Heat Press Machine: A Foundational Overview
- The Seven Pillars of Heat Press Application
- Step 1: The Sanctity of Preparation: Workspace and Machine Setup
- Step 2: Material Selection and Design Preparation
- Step 3: The Golden Triangle: Calibrating Temperature, Time, and Pressure
- Step 4: The Art of Alignment: Positioning Substrate and Transfer
- Step 5: The Moment of Transformation: Executing the Press
- Step 6: The Revelation: Mastering the Peel
- Step 7: Preservation and Problem-Solving: Post-Press Care and Troubleshooting
- Beyond the Flat Surface: Mastering Combo and Specialty Presses
- Frequently Asked Questions
- Заключение
- Ссылки
Understanding the Heat Press Machine: A Foundational Overview
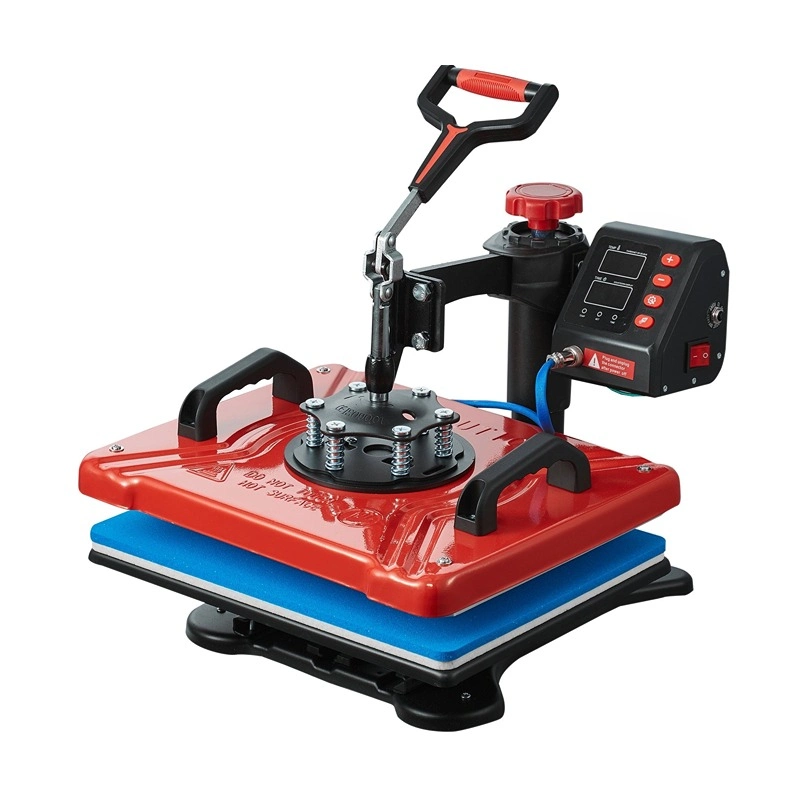
Embarking on the journey of custom creation begins with a fundamental comprehension of your primary tool. A heat press machine, in its essence, is a device engineered to apply heat and pressure to a substrate for a specific duration (Allprintheads.com, 2024). Think of it not as a mere hot iron, but as a precision instrument. Where a household iron delivers inconsistent heat and uneven pressure, a heat press provides a controlled environment, ensuring that every square centimeter of your design receives the exact same treatment. This uniformity is the very soul of a professional and durable transfer.
The machine consists of two primary components: a heated upper platen and a stationary lower platen. When brought together, they create a crucible where designs are permanently bonded to materials like t-shirts, mugs, hats, or tote bags. This process allows for the creation of custom goods that were once the exclusive domain of large-scale printing factories. Now, this power resides in workshops and homes across the globe, from the bustling markets of Southeast Asia to the entrepreneurial hubs in South Africa.
Clamshell vs. Swing-Away: A Tale of Two Designs
The first choice many encounter is the style of the machine itself. The two most common designs are the clamshell and the swing-away. The names are quite descriptive of their function.
A clamshell press opens and closes on a hinge at the back, much like its namesake mollusk (Heat Transfer Warehouse, 2024). Its primary advantage is its smaller footprint. For a creator with limited space, a clamshell is an efficient choice. It is also generally faster to operate, as the motion of opening and closing is direct and requires less movement. However, this design presents a challenge. The proximity of the heated upper platen can make arranging the garment and transfer on the lower platen a slightly precarious task, requiring careful and deliberate hand movements to avoid contact with the hot surface.
Conversely, a swing-away press allows the upper platen to be swung completely away from the lower platen. This provides an unobstructed, open workspace. The benefit here is clear: you have ample room and a clear line of sight to position your garment and design with precision and safety. This design is particularly advantageous when working with thicker items or when precise placement is paramount. The trade-off is the larger physical space required to accommodate the swinging motion of the upper platen.
The choice between these two is not about which is "better," but which better serves your specific needs, your workspace, and your comfort level. Do you value speed and a compact form, or do you prioritize an open workspace and ease of alignment?
| Характеристика | Термопресс для раковины | Термопресс с поворотным механизмом |
|---|---|---|
| Workspace Footprint | Smaller, more compact | Larger, requires more side clearance |
| Operation Speed | Faster due to simple up-and-down motion | Slower due to two-step swing and press motion |
| Доступ к рабочему пространству | Limited; hands work under the heated platen | Excellent; full, unobstructed access to the lower platen |
| Item Thickness | Better for thinner items like t-shirts | Accommodates thicker items more easily |
| Ease of Alignment | Can be challenging due to limited visibility | Easier and more precise alignment |
| Ideal User | High-volume production, limited space | Beginners, detailed work, thick substrates |
The Language of Heat Transfer: A Glossary of Methods
To effectively use a heat press machine, one must be fluent in the language of the materials it applies. The machine is the tool, but the transfer medium is the art. Several popular methods exist, each with its own character, application process, and ideal use case.
Heat Transfer Vinyl (HTV): This is perhaps the most common entry point for many creators. HTV is a polyurethane material that comes on a clear carrier sheet. A design is cut into the vinyl (in reverse), and the excess material is weeded away. The remaining design is then placed on the garment and pressed. The heat activates an adhesive on the back of the vinyl, bonding it to the fabric. HTV comes in a staggering array of finishes: glossy, matte, glitter, flock (which has a fuzzy, suede-like texture), holographic, and more. It is ideal for simple text, logos, and shape-based designs.
Сублимация: This process feels almost like magic. Sublimation works by printing a design with special sublimation inks onto sublimation paper. When heat and pressure are applied, the ink turns directly from a solid into a gas (sublimates) and permeates the fibers of the substrate. It is not sitting on top of the material like HTV; it becomes part of the material itself. This results in a transfer with zero feel or "hand," and incredible durability and vibrancy. The significant consideration for sublimation is that it only works on polyester fabrics (or high-polyester blends) and specially coated hard surfaces, like ceramic mugs or metal panels. It also does not work on dark-colored substrates, as the dyes are transparent.
Direct-to-Film (DTF) Transfers: DTF is a newer technology that bridges the gap between HTV and other printing methods. A design is digitally printed onto a special film, and a powdered adhesive is applied to the back of the ink. This film can then be pressed onto virtually any fabric type—cotton, polyester, blends, leather—and any color. The result is a vibrant, soft, and stretchy transfer that feels much like a high-quality screen print. It allows for full-color, complex designs without the need for weeding vinyl.
Трансферы с трафаретной печатью: This method combines traditional screen printing with the convenience of a heat press. A design is screen printed with plastisol inks onto a special release paper instead of directly onto a garment. You can then use your heat press to apply this pre-printed transfer to a shirt at a later time. This is an excellent option for producing a large number of the same design to be applied on demand.
Understanding these different methods is not just academic. It directly informs every decision you will make, from the temperature you set to the way you peel the transfer away after pressing.
The Seven Pillars of Heat Press Application
Learning how to use a heat press machine is a journey of seven distinct, yet interconnected, stages. Each stage, or pillar, supports the next, and neglecting any one of them can compromise the integrity of the final product. We will now walk through these seven pillars, treating each with the careful consideration it deserves.
Step 1: The Sanctity of Preparation: Workspace and Machine Setup
Before the first spark of creation, there must be order. A well-prepared workspace is not just a matter of efficiency; it is a matter of safety and quality. Your heat press is a powerful tool that commands respect.
Forging a Safe Haven
Your workspace should be built on a foundation of safety. The heat press machine should be placed on a sturdy, stable, and level surface that can comfortably support its weight. A wobbly table is a recipe for an inconsistent press at best, and a dangerous accident at worst. Consider the area around the machine. Is there adequate ventilation? While most heat transfer processes do not release toxic fumes, some materials can produce odors, and good airflow is always a sound practice.
Think about the electrical supply. A heat press draws a significant amount of power. It should ideally be plugged directly into a wall outlet on a circuit that is not already burdened by other heavy-duty appliances. Using a flimsy extension cord is a fire hazard and can lead to voltage drops that affect the machine's ability to maintain a consistent temperature.
Keep your workspace clear of clutter. You will need room for your blank garments, your transfers, your tools, and your finished products. A disorganized space leads to mistakes—a misplaced transfer, a wrinkle in the garment, or even a burn.
Knowing Your Instrument
Take a moment to familiarize yourself with the anatomy of your heat press. Identify the upper platen (the hot part) and the lower platen (the base). Locate the digital controller. This is the brain of the operation, where you will set the temperature and time. Find the pressure adjustment knob. This is often a large wheel located on top of the machine or integrated into the central column. Turning it clockwise typically increases pressure, while counter-clockwise decreases it. Feel the handle. Understand the force required to close and lock it, and how to release it smoothly.
Before your first real project, perform a power-on test. Turn the machine on and set a moderate temperature, perhaps 150°C (300°F). Watch the digital display. Does the temperature rise steadily and hold once it reaches the target? This simple test confirms that the heating element and thermostat are functioning correctly. This is also a good time to become comfortable with the feel of opening and closing the press while it is cold.
Step 2: Material Selection and Design Preparation
With a safe and organized workspace, your focus now shifts to the materials themselves. The substrate and the transfer are the canvas and paint of your creation. Their compatibility and preparation are paramount.
Choosing Your Canvas: The Substrate
The term "substrate" simply refers to the item you are printing on. This could be a cotton t-shirt for a community event in a Russian town, a polyester performance jersey for a sports team in Brazil, or a set of ceramic mugs for a new coffee shop in Dubai. The nature of the substrate dictates the entire process.
If you are working with garments, it is wise to pre-wash and dry them without fabric softener. New garments often have a chemical sizing applied at the factory that can interfere with the transfer's adhesion. Fabric softener leaves a residue that can have a similar negative effect.
For hard substrates like mugs or tiles, ensure the surface is perfectly clean and free of dust or oils from your hands. A quick wipe with isopropyl alcohol on a lint-free cloth is an excellent practice. Remember, sublimation requires a special polyester coating on these hard surfaces. You cannot sublimate onto any old mug from the store; it must be a "sublimation blank."
Preparing the Art: The Transfer
The preparation of your design is a meticulous process that demands patience.
If you are using Винил для теплопередачи (HTV), your design will be cut using a vinyl cutter. A critical detail here is to mirror your design before cutting. Since you will be placing the vinyl face down on the garment, the design must be cut in reverse to appear correctly after pressing. Once cut, the "weeding" process begins. This involves using a small, sharp tool, like a weeding hook, to remove all the excess vinyl that is not part of your design. This can be a delicate, almost meditative task, especially with intricate designs.
For sublimation or DTF transfers, the preparation involves printing your design. For sublimation, you need sublimation ink and sublimation paper. For DTF, you need DTF inks and films. Ensure your printer settings are optimized for the highest quality output. The vibrancy of your final product is born here, in the quality of the print. After printing a DTF transfer, it must be coated with a powdered adhesive while the ink is still wet, and then cured.
No matter the transfer type, trim the carrier sheet or paper close to the design. This makes alignment easier and reduces the chance of the edge of the paper leaving a faint impression on the garment.
Step 3: The Golden Triangle: Calibrating Temperature, Time, and Pressure
We now arrive at the heart of the matter: the "Golden Triangle" of heat pressing. Temperature, time, and pressure are the three interdependent variables that you must control to achieve a perfect press. Getting this combination right is the most critical skill you will develop. There is no universal setting; the correct formula is determined by two things: the type of transfer material and the type of substrate (Joto Imaging Supplies, 2024).
Understanding the Variables
Температура: This is the heat required to activate the adhesive (in HTV or DTF) or to cause the ink to sublimate. Too little heat, and the transfer will not bond properly. Too much heat, and you risk scorching the garment or damaging the transfer itself.
Время: This is the duration for which heat and pressure are applied. Too little time, and the bonding or sublimation process will be incomplete. Too much time can lead to the same problems as excessive heat—scorching, or ink "bleeding" and losing sharpness.
Давление: This is the amount of force exerted by the machine. It ensures intimate contact between the transfer and the substrate. Pressure can usually be described as light, medium, or heavy. Too little pressure results in a weak bond, while too much pressure can cause the adhesive to squeeze out from the edges of the design and may leave a heavy impression of the platen on the fabric.
Finding the Magic Numbers
So, how do you find the correct settings? Your first and most reliable source of information is the manufacturer of your transfer material. Whether it is a roll of vinyl or a pack of sublimation paper, it should come with recommended settings. These are your starting point.
However, not all heat presses are created equal. The temperature on your display might be slightly different from the actual temperature of the platen. This is why a test press is not just recommended; it is a professional necessity. Before you press your final garment, take a scrap piece of the same material or an inconspicuous area of the item (like the inside hem) and press a small piece of your transfer material.
Хорошо ли он приклеивается? Яркий ли цвет? Нет ли подпалин? Этот небольшой тест может избавить вас от душевной боли и расходов, связанных с порчей ценной одежды.
Здесь приведено общее руководство, иллюстрирующее различия в настройках. Рассматривайте это как учебный пример, а не как окончательное правило. Всегда обращайтесь к производителю вашего материала'.
| Тип передачи | Общий субстрат | Диапазон температур (°C) | Диапазон температур (°F) | Время (секунды) | Давление | Тип пилинга |
|---|---|---|---|---|---|---|
| Стандартный HTV | Смесь хлопка и поливинилацетата | 150 - 160°C | 300 - 320°F | 10 – 15 | Средний | Горячий или холодный |
| Глиттер HTV | Смесь хлопка и поливинилацетата | 160 - 170°C | 320 - 340°F | 15 – 20 | Фирма | Теплый |
| Сублимация | 100% Полиэстер | 195 - 205°C | 385 - 400°F | 45 – 60 | Светло-средний | Горячая |
| Переводы DTF | Хлопок, поли, смеси | 140 - 165°C | 285 - 330°F | 8 – 15 | Средний | Холод |
| Трафаретная печать | Смесь хлопка и поливинилацетата | 175 - 190°C | 350 - 375°F | 7 – 12 | Фирма | Горячая |
Калибровка давления
Задать температуру и время очень просто - достаточно ввести цифры. А вот давление - это скорее тактильный навык. Как узнать, каково "среднее" давление?
Начните с того, что пресс должен быть открыт, а ручка прижима ослаблена. Поместите одежду на нижнюю плиту. Закройте пресс. Если он закрывается почти без сопротивления, значит, давление слишком слабое. Откройте пресс, поверните ручку давления по часовой стрелке на полный оборот и повторите попытку. Повторите этот процесс. Для небольшое давлениеВы должны быть в состоянии закрыть и зафиксировать ручку одной рукой с минимальным усилием. Для среднее давлениеСкорее всего, вам придется использовать две руки с сильным, но комфортным усилием. Для сильное давлениеЧтобы зафиксировать ручку на месте, нужно приложить значительное усилие. Этот навык вырабатывается с опытом. Также может помочь "бумажный тест": положите лист бумаги в каждый из четырех углов валика и закройте его. Если вы можете легко вытащить бумагу, значит, давление неравномерно.
Step 4: The Art of Alignment: Positioning Substrate and Transfer
Идеально отпечатанный дизайн, расположенный криво или не по центру, - источник огромного разочарования. Этот этап - это точность и подготовка, гарантирующие, что ваше произведение будет размещено именно там, где вы его задумали.
Допечатная подготовка: Неприкосновенный ритуал
Прежде чем приступить к нанесению рисунка, необходимо выполнить предварительную печать. Положите ткань на нижнюю пластину и прижмите ее на 3-5 секунд. Это простое действие позволяет добиться двух важных результатов. Во-первых, удаляются все морщины, и вы получаете идеально ровную и гладкую поверхность для работы. При нанесении трансфера на морщину эта морщина станет постоянной частью рисунка. Во-вторых, он удаляет остатки влаги с ткани. Влага может превратиться в пар во время полного пресса, что может нарушить адгезию и привести к потускнению цветов. Считайте, что предварительная печать - это глажка холста перед тем, как начать рисовать.
Поиск центра
После предварительной печати необходимо окончательно разместить одежду. Задача состоит в том, чтобы положить его ровно и гладко на нижний вал. Для футболок обычно используется техника складывания футболки пополам по вертикали и быстрого легкого нажатия, чтобы создать слабую центральную линию. То же самое можно сделать и с трансфером, сложив его пополам (осторожно, чтобы не помять сильно), чтобы найти его центр. Затем вы можете совместить две центральные метки.
Для последовательного размещения рисунка, особенно при серийном производстве, можно использовать инструменты. Простая линейка или направляющая для выравнивания футболок может быть размещена на воротнике, обеспечивая разметку, чтобы ваш дизайн был отцентрирован и находился на правильном расстоянии от воротника каждый раз. В некоторых продвинутых установках используются даже лазерные системы выравнивания, которые проецируют перекрестие на одежду.
Обеспечение безопасности конструкции
Once you have your design in the perfect spot, you need to make sure it stays there. The act of closing the press can sometimes cause the transfer to shift slightly. To prevent this, use a few small pieces of heat-resistant tape to secure the corners of your transfer paper or carrier sheet to the garment. This tape is specially designed to withstand the high temperatures of the press without leaving any residue. This is especially important when working with slippery polyester fabrics or with sublimation, where any movement during the press can cause a "ghosting" or blurred effect.
Finally, always use a protective sheet. A Teflon sheet or a piece of parchment paper should be placed over the transfer and garment before pressing. This serves several purposes. It protects your upper platen from any inks or adhesives that might bleed through the transfer paper. It protects your garment from direct contact with the metal platen, reducing the risk of scorching. It also helps to distribute the heat a little more evenly. This sheet is a small investment that protects both your project and your machine.
Step 5: The Moment of Transformation: Executing the Press
All the preparation has led to this moment. The settings are dialed in, the garment and transfer are perfectly positioned, and the protective sheet is in place. It is time to execute the press.
The Physical Act
With a final check to ensure everything is smooth and correctly placed, firmly pull the handle down to close the press. On a clamshell machine, this is a straight downward motion. On a swing-away, you will first swing the platen over the garment and then pull the handle down. The machine should lock into place, and the timer should begin its countdown automatically.
This is a moment of transformation. Inside that heated chamber, a physical and chemical reaction is taking place. Adhesives are melting and flowing into the fabric's fibers. Sublimation dyes are turning into a gas and permanently embedding themselves into the polyester molecules. It is a process governed by the physics and chemistry you have orchestrated with your settings.
What should you be doing during this time? Nothing. Resist the urge to press down further on the handle or move the machine. The press is designed to provide consistent, even pressure. Your job is to wait patiently for the timer to reach zero. Many machines will emit an audible beep to let you know the process is complete.
The Release
When the alarm sounds, it is time to open the press. Do this in a single, smooth, and confident motion. Do not hesitate halfway through. Move the handle up to unlock the platen. If you have a swing-away model, swing the heated platen away from the workspace immediately to prevent continued heat exposure to the garment. Some more advanced machines feature an "auto-open" function, where the press will automatically pop open when the timer finishes. This is a wonderful feature that prevents over-pressing if you get distracted.
Your garment is now "cooked." But the process is not quite finished. The next step is one of the most delicate and is often where mistakes are made by beginners.
Step 6: The Revelation: Mastering the Peel
The moment you peel the carrier sheet or paper away from the garment is the moment of truth. This is when your design is finally revealed. But how you peel is just as important as how you pressed. The instructions from your transfer manufacturer will specify one of three peel types: hot, warm, or cold.
The Science of the Peel
Hot Peel: This means you must peel the carrier sheet away immediately after the press opens, while the garment is still extremely hot. This is common for some types of HTV and most screen printed transfers. The adhesive is designed to bond to the fabric and release from the carrier while it is at its melting point. Waiting for it to cool can cause the adhesive to re-bond to the carrier, potentially pulling the design up with it. When performing a hot peel, pull the sheet back in a smooth, continuous motion. Do not rip it off like a bandage, but do not hesitate either.
Warm Peel: This requires you to wait a few seconds after opening the press. Perhaps 5 to 10 seconds, until the item is no longer scorching hot but still quite warm to the touch. This allows the adhesive to set slightly before the carrier is removed. Many glitter and specialty HTVs use a warm peel.
Cold Peel: This means you must wait until the garment and transfer are completely cool to the touch. You may even want to remove the garment from the press and wave it in the air or lay it on a cool surface to speed up the process. DTF transfers and some types of sublimation paper require a cold peel. The chemistry here is such that the bond to the substrate is only fully solidified once it has cooled. Peeling too early can result in an incomplete transfer, with parts of the design being pulled away.
The Technique
Regardless of the peel temperature, the technique is similar. Start at one corner and peel the carrier sheet back low and flat against the garment, not straight up. Peeling straight up puts vertical stress on the design, whereas peeling low and back creates a shearing force that is much gentler on the fresh transfer.
What if something goes wrong? If you start to peel and notice the design is lifting with the carrier, stop immediately. Lay the carrier sheet back down, cover it with your protective sheet, and press it again for a few more seconds. This can often solve the problem. It may indicate that your temperature was a little too low, your time was too short, or your pressure was insufficient. This is another reason why test presses are so valuable—they help you diagnose these issues on a scrap, not on your final product.
Step 7: Preservation and Problem-Solving: Post-Press Care and Troubleshooting
You have successfully pressed and peeled your design. It looks perfect. The final step is to ensure it stays that way. This involves a final post-press action and providing proper care instructions. This stage also involves learning to recognize and fix common problems.
Curing and Aftercare
For many transfer types, especially HTV and DTF, a final "post-press" can work wonders for durability and finish. After you have peeled the carrier sheet, place your protective Teflon sheet directly on the exposed design and press it again for 2-4 seconds. This does two things: it helps to further set the adhesive into the fabric's weave, and it can reduce the glossy finish of some vinyls, giving the design a more professional, screen-print-like appearance.
The longevity of a custom garment depends heavily on how it is cared for. You should always advise the end-user (or follow these rules for your own items) to:
- Turn the garment inside out before washing.
- Wash in cold water on a gentle cycle.
- Avoid harsh detergents and bleach. Do not use fabric softener.
- Tumble dry on low heat or, for best results, hang to dry.
- Do not iron directly on the design.
These instructions ensure the design remains vibrant and intact for years to come.
A Compendium of Common Issues
Even with careful preparation, issues can arise. Learning to troubleshoot is the mark of a skilled heat press operator.
The Vinyl is Peeling or Lifting: This is the most common issue for beginners. It is almost always a result of an incorrect setting in the Golden Triangle.
- Cause: Insufficient temperature, time, or pressure.
- Solution: Check the manufacturer's recommendations. Increase one variable at a time. A 5-10 degree increase in temperature or a 2-3 second increase in time can often solve it. Ensure your pressure is firm enough. Also, check that you are not using a fabric softener-treated garment.
The Garment is Scorched or Discolored: You press a white polyester shirt and are left with a yellowish rectangle where the platen was.
- Cause: Temperature is too high for the fabric type. Polyester and some synthetic blends are very sensitive to heat.
- Solution: Lower the temperature. Use the lowest possible temperature recommended by your transfer manufacturer that still provides good adhesion. Always use a protective sheet. Sometimes, a "heat press pillow" or a piece of foam inserted inside the shirt can help distribute heat and pressure more evenly, reducing the hard lines of the platen edge.
Sublimation Appears Faded or Blotchy: Your vibrant design on the paper has turned into a pale, disappointing image on the mug or shirt.
- Cause: This can have several causes. Insufficient time, temperature, or pressure is a primary suspect. Using the wrong substrate (e.g., a cotton shirt instead of polyester) is another. Moisture in the substrate is also a major culprit.
- Solution: Confirm you are using a 100% polyester (for garments) or a sublimation-coated blank. Always pre-press to remove moisture. Increase your press time or temperature in small increments. Ensure you have even, light-to-medium pressure.
"Ghosting" in Sublimation: The design has a faint, blurry shadow next to it.
- Cause: The sublimation paper shifted during the press or upon opening.
- Solution: Always use heat-resistant tape to secure your sublimation paper firmly to the substrate. Open the press carefully and remove the item without allowing the paper to slide.
Learning how to use a heat press machine is a continuous process of refinement. Each project is a lesson. By understanding the principles behind each step, you move from simply following instructions to becoming a true craftsman.
Beyond the Flat Surface: Mastering Combo and Specialty Presses
The world of heat pressing extends far beyond the flat plane of a t-shirt. With the right equipment, you can bring your creative visions to life on a diverse array of objects, from the morning coffee mug to the casual baseball cap. This is the domain of specialty presses and versatile combo machines.
The Ingenuity of the Combo Heat Press Machine
For the creator looking to diversify their offerings without investing in multiple separate machines, a комбинированная термопрессовая машина is an elegant and space-saving solution. These are modular systems built around a central control unit and base, with interchangeable platens and heating elements. A typical combo press might include:
- A standard flat platen for t-shirts and other flat items.
- One or more mug attachments of varying sizes.
- A hat attachment with a curved platen.
- Plate attachments of different diameters.
The beauty of such a system lies in its adaptability. In the morning, you could be pressing a run of promotional t-shirts. In the afternoon, with a few simple adjustments, you could be personalizing a set of mugs for a local café. This flexibility is invaluable for small businesses and hobbyists exploring different markets.
Mastering the Mug Press
Using a mug press attachment introduces a new geometry to the heat press process. The goal is to wrap the heat evenly around the cylindrical surface of the mug.
- Preparation: Your design is printed on sublimation paper (remember, the mug must be a sublimation blank). You then trim the paper and wrap it tightly around the mug, ensuring it is straight and centered. Secure it firmly with heat-resistant tape. Any looseness will result in blurry or faded spots.
- Settings: Mug pressing typically requires high temperatures (around 200°C / 400°F) and a long press time (often several minutes). The mug acts as a significant heat sink, so it takes time for the entire surface to reach the required sublimation temperature.
- Прессование: Place the mug into the cold press attachment and clamp it shut. The pressure should be firm enough that the mug cannot be easily rotated, but not so tight that you risk breaking the handle. Once the press reaches its target temperature, the timer will begin.
- Completion: When the timer beeps, open the press carefully. The mug will be extraordinarily hot. Use a heat-resistant glove to remove it. Place it on a heat-proof surface to cool. In most cases, you should peel the sublimation paper off immediately while it is still hot to prevent the gassed ink from re-settling unevenly.
Conquering the Hat Heat Press
A hat heat press machine, or attachment, is specifically designed to handle the curved surface of a cap. It features a curved upper platen and a corresponding curved lower form to support the hat's front panel.
- Preparation: The key challenge with hats is securing them properly on the press. Most hat presses have a tensioning lever or strap that pulls the hat's front panel taut against the lower form. This is critical for creating a smooth, wrinkle-free surface.
- Alignment: Place your transfer (often smaller HTV or DTF designs) onto the front panel. The curved surface can make alignment tricky, so take your time. Using heat-resistant tape is highly recommended.
- Прессование: The settings for hats are similar to those for t-shirts, depending on the transfer type. Close the curved platen over the hat. The pressure should be firm to ensure good contact across the entire design.
- Peeling: Follow the peel instructions for your specific transfer material (hot, warm, or cold). Carefully remove the hat from the press.
Working with these specialty presses requires a slight adjustment in thinking. You are no longer dealing with a simple flat plane. You must consider how heat and pressure are distributed across a curved surface. But the fundamental principles—the Golden Triangle, proper preparation, and meticulous execution—remain the same. Mastering these attachments unlocks a vast new world of products you can create.
Frequently Asked Questions
Q1: What is the real difference between using a heat press and a home iron? A home iron cannot provide the two most important elements for a durable transfer: consistent temperature and even pressure. An iron has hot spots and cool spots, and it is impossible to apply uniform pressure by hand. This leads to vinyl that peels after one wash or sublimation that looks blotchy. A heat press is a precision tool that guarantees uniform heat and pressure across the entire design, which is the secret to a professional, long-lasting product.
Q2: Why is my heat transfer vinyl not sticking to the shirt? This is the most frequent issue and typically points to one of three culprits in the "Golden Triangle": temperature, time, or pressure. First, ensure you have enough pressure; it should take some firm effort to close the press. If pressure is good, try increasing the temperature by 5-10 degrees or the time by 2-3 seconds. Also, confirm the garment was not treated with fabric softener and that you are following the correct hot/warm/cold peel instructions for your specific vinyl.
Q3: Can I use a heat press on any type of fabric? While you can press on many fabrics, not all are suitable. 100% cotton, 100% polyester, and cotton/poly blends are the most common and reliable. However, heat-sensitive materials like nylon, spandex, and some synthetics can melt or scorch at standard pressing temperatures. For these, you need special low-temperature application vinyl. Materials with heavy textures, seams, or zippers in the press area are also challenging. Always test on a scrap piece if you are unsure.
Q4: My sublimation prints look faded. What am I doing wrong? Faded sublimation is usually caused by an issue with temperature, time, or the substrate itself. Sublimation requires high heat (typically 195-205°C / 385-400°F) and significant time (45-60 seconds for fabric) to work. Ensure your settings are correct. Most importantly, sublimation only works on 100% polyester fabric (or high-poly blends) or specially coated hard surfaces. Attempting to sublimate on 100% cotton will result in a very faded, washed-out look that will disappear after washing.
Q5: What does "medium pressure" actually feel like on a manual press? This is a tactile skill that takes practice. As a general guide, set the pressure so that you need to use two hands and a moderate amount of effort to lock the handle down. It should not be easy, but it also should not require your full body weight. The press should feel very secure and tight when closed. A good test is to close the press on a piece of paper; with medium pressure, you should not be able to pull the paper out easily.
Q6: Do I really need to use a protective sheet like Teflon or parchment paper? Yes, absolutely. This is a non-negotiable step for professionals. A protective sheet does three things: it protects your garment from direct contact with the hot metal platen, preventing scorching. It protects your platen from any inks or adhesives that might transfer through, keeping it clean for future jobs. It also helps to distribute heat evenly. It is a small, inexpensive item that protects both your project and your equipment investment.
Q7: How do I know whether to use a hot, warm, or cold peel? This information is determined by the manufacturer of your transfer material (HTV, DTF, etc.). It should be clearly stated on the product packaging or the supplier's website. The type of adhesive or ink chemistry determines when it is optimal to remove the carrier sheet. Following this instruction is critical; peeling at the wrong temperature is a primary cause of failed transfers.
Заключение
The journey of learning how to use a heat press machine is one of moving from mechanical action to intuitive understanding. It begins with the foundational respect for the workspace and the machine, progresses through the careful selection and preparation of materials, and culminates in the masterful manipulation of temperature, time, and pressure. The seven pillars—preparation, material selection, calibration, alignment, execution, peeling, and aftercare—are not merely a checklist, but a holistic philosophy for creation. Each press is an opportunity to refine your technique, to better understand the dialogue between heat and material, and to move closer to flawless execution.
Whether you are pressing a simple one-color logo onto a cotton t-shirt or a complex, full-color photograph onto a ceramic mug, the underlying principles remain constant. The satisfaction comes not just from the finished product, but from the knowledge that you have successfully orchestrated a complex series of physical and chemical reactions to create something durable and beautiful. This guide has provided the map, but the territory can only be known through practice, experimentation, and a persistent desire to learn. Embrace the process, learn from your mistakes, and you will unlock a world of creative and commercial possibility.
Ссылки
Allprintheads.com. (2024, April 6). The ultimate heat press buyer's guide. All Printheads. https://www.allprintheads.com/blogs/news/heatpress-buyers-guide
Heat Press Nation. (2025, March 12). Heat press 101. https://www.heatpressnation.com/pages/heat-press-101-tutorial
Heat Transfer Warehouse. (2024, September 6). Heat press buying guide: How to choose the right heat press machine. https://www.heattransferwarehouse.com/heat-press-buying-guide-how-to-choose-the-right-heat-press-machine/
Joto Imaging Supplies. (2024, July 18). Heat press guide: Mastering temperature and time settings. https://jotoimagingsupplies.com/blogs/blogs/heat-press-guide-mastering-temperature-and-time-settings
Ninjatransfers.com. (2025, May 14). How to pick a heat press machine | A guide. Ninja Transfers. https://ninjatransfers.com/en-gb/pages/how-to-pick-a-heat-press-machine
Stahls'. (2025). Heat press comparison chart.